YOGA BLOG
What Moves Us…..

Richard's Asana Breakdown: muditā śiśu āsana
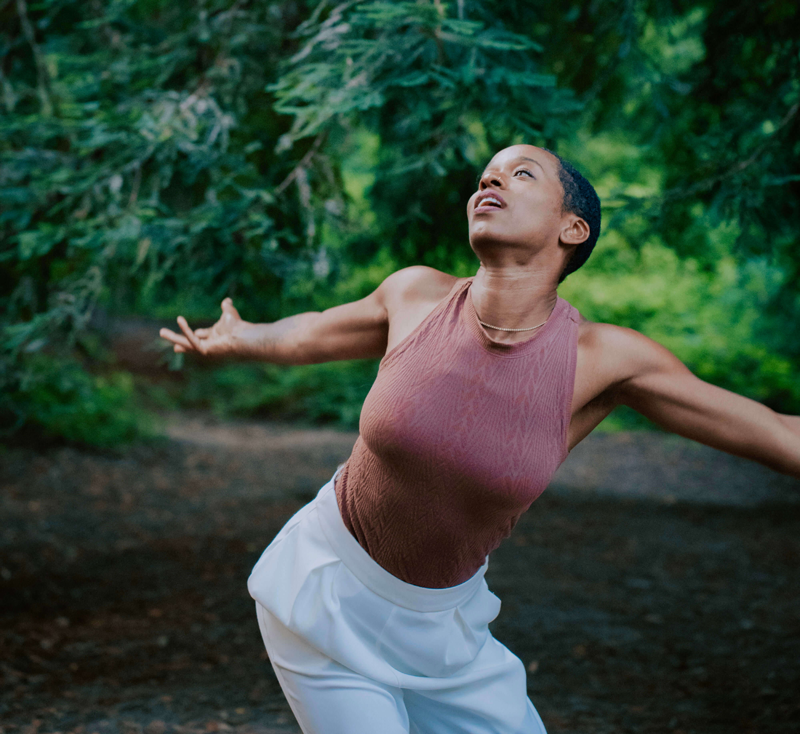
JOYFUL BABY POSE
muditā śiśu āsana
muditā (moo-dee-TAH) = delighted, joyful, glad, rejoicing in
śiśu (shi-shoo) = baby
The projection of friendliness, compassion, joyfulness, and equanimity towards objects–be they joyful, sorrowful, meritorious or demeritorious–bring about the pacification of consciousness.
Yoga Sutra 1.33
Muditā is rooted in the word mud (pronounced mood), “joy, delight, gladness, happiness.” If you’ve ever read the 4th or 5th century CE Yoga Sutra, you may recall that muditā is one of the four, Buddhist-inspired practices listed at 1.33. These practices are first found in a 3rd century BCE text titled the Majjhima Nikāya, the “Collection (nikāya) of Middle-length Discourses” (majjhima) of the Buddha. Note that these words aren’t Sanskrit; instead, they’re Pali, the ancient liturgical language of the Theravādan Buddhists. In that text, the four are known as the “stations of Brahma” (brahma vihāra); along with joyfulness, there’s friendliness (maitrī, my-TREE), compassion (karuņa, kuh-roo-nuh), and a word often translated as “indifference,” but probably should be qualified with a word like “benevolent” (upekşa, oo-payk-shuh
Now why or to whom should we be friendly, compassionate, joyful, and benevolent? Vyasa, the first commentator on the sutras, explains that we should be friendly to those who’ve experienced happiness, compassionate to those in distress, joyful to those “treading the path of virtue,” and benevolent to those who’ve wandered off that path. These attitudes, as the sutra says, pacifies the mind, which then becomes one-pointed and serene. This sutra and the next six to 1.39 are together known as “ways of polishing or training the mind” (parikarman).
The names of poses are often reflections of their outward appearance. Downward Facing Dog (adho mukha svanāsana) is a good example (and much better than the pose’s original name, gajāsana, the Elephant). On the other hand, some names don’t make much sense at all; what the heck is a triang mukhaikapada paścimottanāsana? But the name here suits the pose well. It’s easy enough to see the practitioner mimicking a nine-month old, rolling around in her crib on her back, frolicking with her beautifully open groins. The name is also an assurance: do this pose regularly and someday, even as an adult, we’ll be able to again play with “joy, delight, gladness, and happiness,” like the baby.
PREPARATION
1. Lie on you back and draw your thighs to your belly on an exhalation. Rock slowly and consciously side to side, widening your back torso away from the spine. Then hold your right thigh to the belly and put your left foot on the floor. The easiest way to do the pose, relatively speaking, is to keep your left leg just as it is. To add a bit more challenge (and who doesn’t want more challenge in their life?), extend the left leg but raise the heel some distance off the floor. You might press your heel against a wall, or support it on a block, at a height that works for you. The closer your heel is to the floor, the more challenging the pose. And finally, for the most challenge, stretch the left leg out on the floor and keep it strong and straight. If you have a wall handy, it helps to press your heel firmly against it.
2. If you’re tighter in the groins, your head may lift off the floor as you perform this pose. If it does, be sure to support the back of your head on a block or thickly folded blanket.
3. Bring your right knee to the outside of your right arm (which for many students is easier said then done), press your elbow against the back of the right thigh just above the knee, cross your forearm to the outside of the foreleg, and hold the outside of your right foot in your hand. Then raise the foreleg to more or less perpendicular to the floor. Again, be sure your head is resting comfortably either on the floor or support.
4. Try to work the back of the shoulder into the angle made by the bent knee, then press the thigh down toward the floor (again, easier said etc.). Try to keep the inner knee against the side of the shoulder. You might be able to narrow the right hip onto the inner thigh. As always, the back pelvis widens like a hand-held fan, while the front pelvis draws together at the navel.
5. Check your left leg. If you have it fully extended, the knee may be buckling slightly. So either re-affirm its strength by pressing out from the back heel and base of the big toe, or raise it slightly off the floor, using a block or the wall for support. And if the leg is already elevated, you might try to raise it higher.
6. Realistically for most of us, a longer stay in this position is needed, as is regular practice. Stay for at least a minute, two would be better. Don’t forget to BREATHE! However, if you’re more open in the groins, a minute should suffice. When time is up, release the leg, shake it out, and repeat on the left side for at least an equal length of time. If you find one side is considerably more bound up than the other, then stay for a bit longer on that side than the other.
If you find this preparation takes you to your limit, you might stay with it for awhile until you feel more comfortable. But if you’re ready to “baby on,” go to the FULL POSE.
FULL POSE
1. Now, as it always does, the moment of truth has arrived. All you need really do is perform the right and left preps together (easier said etc.). You might find the full pose a slight to considerably greater challenge.
2. Exhale and bring both thighs to the belly, then move them off to the sides of your shoulders, and work the backs of the upper arms across the back thighs just above the knees, swing your forearms to the outside of the forelegs, and hold the outer edges of the feet. This is all exactly what you did for prep, though one side at a time.
3. Your head may not have needed a support for the prep, but it may now, so be sure to prop it up to keep the neck long and the throat soft.
4. It may be more of a challenge (I speak from long experience) to hold the full pose for a time equal to that of the prep. Find a time to stay that’s reasonable for you and call it a day (but don’t quit just because you’re bored). Make note of that time, and in practice on the next day, remember what a famous yogi once said: “Today’s maximum is tomorrow’s minimum.”
ALTERNATIVE
It might happen that pressing your elbows to the back thighs and then holding the outer feet is something you can’t manage comfortably, or at least relatively so. Simply reach your forearms up along the outside of your forelegs, and hold the outer edges of the feet. Can’t easily take the feet? Use straps.

Richard's Asana Breakdown: VASISHTHASANA (Tree variation)
VASISHTHASANA (Tree variation)
Vasishtha = literally, “most wealthy”
Popularly known as Side Plank
Vasishtha (pronounced vuh-sish-tuh) is the name of a celebrated Vedic sage. He’s best remembered as the owner of a miraculous cow, Nandini, the “cow of plenty,” who had the power to grant its owner whatever he could desire, hence Vasishtha’s name. Born directly from the brain of the creator deity, Brahma, he’s one of the seven great seers (sapta rishi) who, according to the ancient myth, receive the timeless words of the Rig Veda at the outset of each world incarnation. As a poet, most of the 104 suktas (“wise sayings,” usually called hymns) collected in the seventh chapter (called a mandala, “circle”) of the Rig are attributed to him.
Apparently, there’s more than one Vasishtha associated with Hindu and yoga literature. Several other texts–the Vasishtha Samhita (“collection”) and the Yoga Vasishtha among them–are attributed, as we can see, to a Vasishtha. These texts, though, were written hundreds of years after the Rig. So unless the original Vasishtha lived a really long time, it’s a safe bet that there were later Vasishthas. Another possibility is that these texts were written by men who attributed their work to a well-known and widely revered sage while remaining anonymous, something that doesn’t happen very often with modern books. But this was a fairly common practice in the yoga tradition. It was felt that by tagging their work with the names of self-realized or semi-divine characters, that work would be thought to be endowed with greater authority.
A search through the Encyclopedia of Traditional Asanas turned up three different poses named vasishthasana. The earliest, from the 18th century, is found in the Joga Pradipika (not to be confused with the Yoga Pradipika; joga is Hindi for “yoga”). Picture sitting on the floor with bent knees, taking your arms outside the thighs and under the knees, then clasping your hands on your crown (the feet a lifted slightly off the floor). Looking straight on at the pose then, the shins make a V shape. The next variant is from the year 1880, found in the Asana Yoga Grantha (“treatise”). Picture sitting on the floor in Bound Angle Pose (baddha konasana), slipping your arms under the shins, taking hold of your feet and raising them above your head. If you’re like me, this picture is as close to this pose as you’ll get. The third variation is from a book authored by T. Krishnamacharya, Yoga Rahasya (“secret”), written, I believe, in the late 1930's. Here at last we find the basic version of the pose we all know and sort of like, in theory if not in practice, so well.
PREPARATION
Balance can be an issue with vasishthasana, so here’s a preparation that will give you a feel for the pose in a more stable variation.
1. Come into Downward Dog (adho mukha svanasana). Step your right foot half-way to your right hand, pivot on the heel and turn the foot so the toes point out to the right, then slide that foot a little closer to your mat’s long edge.
2. Inhale, swing on to the outer edge of your left foot, turn your torso to the right, and swing your right hand to your right hip. You now should be resting on your left hand and the outer edge of the left foot, with your bent-knee right foot out in front of the rest of the body providing stability. Press your left hand actively to the floor, emphasizing the contact on the base of the index finger. Imagine your arm is rooted in your spine, so that you push against the floor from deep inside your upper back.
3. Try to create a straight line from heels to head diagonal to the floor. Oftentimes the pelvis is doing one of two things: it’s either pushed up toward the ceiling, creating a kind of shallow upside down U, or sagging toward the floor, creating a kind of shallow U. Adjust as best you can.
4. In photos of this pose, we often see the supporting hand positioned directly below its shoulder. It’s my humble opinion this isn’t the best placement, it will tend to jam the joint, and we prefer yoga jelly to jam. Ideally, the hand should be slightly ahead of the shoulder so the supporting arm is parallel to the line across the top of the shoulders, not perpendicular to the floor. The same goes if you want to stretch the free arm up. Adjust it too parallel to the shoulder line, so the arms, like the rest of your body, are slightly angled relative to the floor.
5. You might imagine there’s a wall in front of your top hand. Push against that imaginary resistance and use it to bring the shoulder blade firmly against your back.
6. Hold for 15 to 30 seemingly endless seconds, then exhale and swing back to Downward Dog. Come down for a rest if needed, then repeat with your right side, left foot forward. Hold for a similar length of time (no cheating), then again back to Downward Dog and release into Child’s Pose (balasana).
PRACTICE
1. If you feel that you might need some help, you can do one of two things. Start in Downward Dog with your heels against your yoga wall, balls of the feet on the floor. Swing on to the outer edge of your left foot as before, but now press your left sole against the wall. Then stack your right foot atop the left and press that sole to the wall as well. Make sure your hand is ahead of the shoulder.
2. The second thing you can do, if you want to work away from the wall, is move into Downward Dog with a foam block within reach. As you swing on to the left side, with your right hand take the block and wedge it, tallest height, under either the left foreleg or thigh, depending on your height. Of course, you can always do the pose without any help.
3. Now comes the tricky part. Exhale and bend your right knee in toward your torso and take hold of the ankle. Lift the right foot up and stand it on your inner left thigh. If you want to mimic the Tree Pose (vrkshasana), touch the ball of the foot first to the inner side of the thigh, then firmly press the heel into inner groin.
4. Be sure not to press the raised knee back. Keep it slightly forward of the line of the torso, so the groin stays soft. Again, stay for 15 to 30 seconds, then swing back to Dog and down into Child’s Pose, take a rest.
5. Now if you’re feeling adventurous, you might try the pose without a wall or block. Be sure to press actively from the tail bone through your heels, keeping the thigh muscles firm. Unless your neck is perfectly aligned with the torso, I strongly advise NOT to turn your head to look up, but keep looking straight ahead.
THINK ON THESE THINGS
Here’s something to think about. Which arm feels stronger? One of my teachers many years ago maintained that for righties, the left arm is stronger, for lefties vice versa. According to him, the dominant hand was best at fine manipulation.

Richard's Asana Breakdown: ADHO MUKHA VRKSASANA
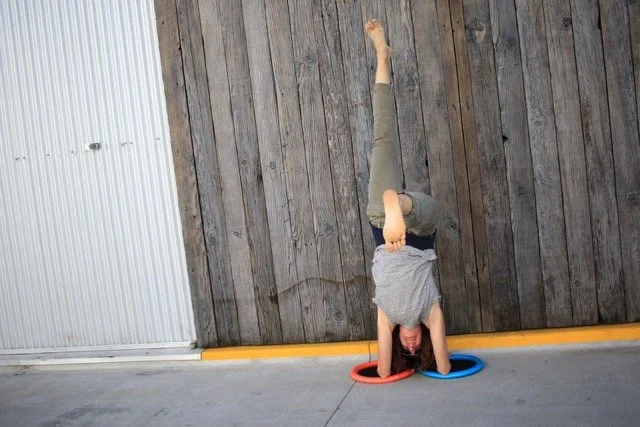
ADHO MUKHA VRKSASANA (downward facing tree)
popularly called Handstand, Arm Balance
adho mukha = having the face downward (mukha = mouth, face)
vrksa = tree
We might think this pose comes to us from modern Western gymnastics, as do some other poses, like hanumanasana, the pose named after the beloved monkey chief in the Ramayana, Hanuman, which of course is the splits. But no, there is some traditional precedence for this pose, possibly back to the late 17th century. I say “possibly” because, as is typical with the old texts, the instructions are sometimes vague and can be interpreted in more than one way. Here are the instructions from the Gheranda Samhita (3.39):
Fixing the palms of the two hands on the ground, raise the legs and head up in the air. The sages say this vajroli mudra conduces to the awakening of kundalini and long life.
Notice first that this exercise is grouped with the mudras or “seals,” and isn’t yet considered an asana. What do you think? Is Gheranda talking about handstand? Or is it a pose more like Full Boat (paripurna navasana) with the hands on the floor slightly behind the pelvis?
I’ll assume that you’re not yet able to balance freely and need to support your heels on a wall. If you don’t already have a wall for your asana practice, be sure you choose one that has nothing hanging on it in the practice area.
PRELIMINARY EXERCISES
In inversions like Handstand and Headstand it’s quite common for students just learning the poses to sink onto their lower back, creating an unpleasant compression and making balance slightly more difficult. What’s needed is some compensatory work with the thighs and tail bone. This exercise may help.
Stand with a block at its narrowest width between your thighs midway between your knees and the base of your pelvis. Roll the block back (inwardly rotate your thighs) and three useful things will happen: the back of your pelvis will widen, the front of your pelvis will narrow, and your front groins will deepen (to make a V shape on your front torso with the two hip points and the pubis); but one thing you don’t want will also happen: your tail bone will poke out from behind your pelvis, compressing your lower back. Now reverse the rotation of your thighs and roll the block forward (outwardly rotate your thighs), and everything will reverse: the back of your pelvis will narrow, the front widen, and the front groins will flatten; but now the tail bone will lengthen toward the floor.
You have to be very careful here NOT to tuck your tail. Think of it lengthening downward and stretching back along the floor like a kangaroo tail. Now very slowly go back and forth between the two extremes, getting a feel for what happens with each rotation. Then, when you feel ready, roll the block back and, at the same time, lengthen your tail bone down, AS IF you were rolling the block forward. The inner thighs and tail resist each other. Stand for a while with the block and continue to feel the inward rotation of your thighs as they’re met by the downward stretching tail. This is what will protect your lower back in Handstand and help to bring you into better alignment.
Now bend forward to standing forward bend. Bring your hands to the back of your pelvis and spread the buttock muscles away from the midline of the sacrum. Repeat three or four times, then slide your hands to your outer hips and soften them as much as possible. From here slide your hands along the outer thighs until they’re opposite the block and press your hands very firmly to squeeze the block. Of course your outer thighs can’t physically do this–that’s the job of the inner thighs–but in yoga these miracles are always possible with a vivid imagination. Then continue with that inward press of your hands to slide them down to the outer ankles. Hook your thumbs around the inner ankles, fingers around the outer and pull up. Imagine you’re trying to lift yourself off the floor (let me know if you succeed, I’ve been trying to do that for at least 30 years). Further imagine a line of energy flowing up along your inner legs to the inner groins. These two lines then pass through the pelvis to the sacrum, where they fan out to your hips and the whole circuit begins again, down the outer legs, up the inner. Repeat three or four times. Then reach a hand behind your legs and slowly draw the block out, feeling how that imparts an inward rotation to your thighs.
Now step back into Downward Facing Dog (adho mukha svanasana). Swing your torso slightly forward, as if moving into plank, and roll your upper arms outwardly. Ideally this will widen your shoulder blades, and at the same time, shift your weight to the little finger sides of your hands. Now, resist the undersides of your arms away from the floor, and maintaining the width of your shoulder blades, push straight back on your thighs and draw the torso straight back from the arms. At the same time, press the outer arms inward as if being bear hugged around the shoulders, again without losing the width of the shoulder blades. This is the action you’ll want to re-create in Handstand. Speaking of which ...
ADHO MUKHA VRKSASANA
Now go to your wall, fold into standing forward bend, and press your hands to the floor a few inches (but no more) away from the wall. Step one foot forward (usually it will be that your dominant leg), this is the kicking leg, while you keep the other straight, this is your swinging leg. Students often bend the swinging when kicking into the pose, which reduces the power of your kick. So keep the swinging (back) leg very strong and straight, and as you swing it up, with an explosive EXHALATION (be sure not to hold your breath), forcefully kick off with the kicking leg. If this is your first or an early attempt, don’t try to spring into the full pose right away. Take a few practice hops always keeping the swinging leg long and strong. Don’t be discouraged if this attempt fails, it’s very common for it to take a few practices sessions before success. There may be a fear factor involved that’s preventing you from getting all the way up. This is quite common too; if this is the case, maybe put a bolster on the floor between your hands, it will offer at least an illusion of a soft place to (crash) land.
Don’t be surprised, when you finally achieve the pose, if your heel thumps hard against the wall, rattling the whole house. As you gain proficiency, you’ll get a better feel of just how much force is needed from the kicking leg to bring your heels lightly to the wall. Re-create the inward turn of your thighs, countered by the lengthening of your tail bone toward the heels, the widening of your shoulder blades, and the inward firming of the outer, upper arms. Bear your weight on the bases of the index fingers, being careful not to let your weight fall heavily on the bases of your palms, this will have an unpleasant effect on your wrists.
Initially stay up for maybe 10 seconds, letting your head release downward. Then step one foot lightly down to the floor and immediately come into a forward bend. Stay for 10 to 15 seconds and come up with a long front torso on an inhale. Gradually increase your stay in the pose, aim for 30 seconds first, and then a minute.
BEGINNING TIP
Go to an open doorway and do a forward bend with your back against one inner side of the door frame. If your hands don’t easily rest on the floor, support them on blocks. Then walk your feet up the inside of the opposite frame, until you’re more or less at a right angle. Press your heels firmly against the frame, and feel how this firms your back to the frame as well. This image of a firm back while kicking up at your wall may help you achieve the pose.
BALANCING TIP
Set your hands in position a few inches away from the wall and kick up. Now lift your head and brace your crown against the wall (you may need to come down and adjust the placement of your hands if you’re too close or two far off the wall). Once you’ve done this, lighten the pressure of one of your heels on the wall. Wait a few seconds, and if you still feel balanced, take that heel off the wall, reaching it very actively to the ceiling. Then return that heel to the wall, and do the same with the other. If both of these experiments are successful, then try both heels together. Continue pressing your crown to the wall, reaching actively through your heels.

Richard's Asana Breakdown: PARIVRTTA TRIKONASANA
PARIVRTTA TRIKONASANA (par-ee-vrit-tah trik-cone-AHS-anna)
parivrtta = to turn around, revolve (from pari, “around,” + vrt, “to turn round”)
trikona = three angle or triangle (from tri, “three,” + kona, “angle”)
Revolved Triangle Pose
Revolved Triangle isn’t a traditional pose, which to me is a pose that existed before the turn of the twentieth century. I’ve managed to trace this pose back to a book written by T. Krishnamacharya, who’s generally regarded as the “father” of modern yoga, the guru of four of the twentieth century’s most revered teachers, the first teacher of modern Ashtanga Yoga, K. Pattabhi Jois his son, T.K.V. Desikachar, his first female student, Indra Devi (nee Eugenie Peterson), his brother-in-law, B.K.S. Iyengar. Titled Yoga Rahasya (Secret of Yoga), it was written around 1937 but not published until 1998. We can assume then that the pose was conceived slightly earlier, though probably not prior to about 1920. There’s a very interesting story regarding the YR, if you want to read it, scroll to the end of the asana breakdown.
Just an aside on the spelling of parivrtta. For English speakers unstudied in Sanskrit, it looks like there should be a vowel–maybe an “i”–between the “v” and the following “t,” something like this: parivritta. You may in fact see this spelling in popular books and magazines. But in fact the “r” of vrtta is a vowel (there should be a dot under the “r” to indicate that, but this word processor doesn’t have that capability), called for obvious reasons, an r-vowel. Sanskrit has two r-vowels, long and short, and a very rarely used l-vowel. Now on to the breakdown.
There are several ways to enter the pose. The way I was taught more than 40 years ago was to begin with parshvottanasna, Intense Side Pose, or more precisely from half that pose with the hands and arms free.
1. Step or hop your feet about a yard apart, slightly less than that makes the pose slightly easier, farther apart makes it slightly more challenging. If you’re tighter in the hips and legs, it’s advisable to position some kind of a lift under your back heel, a thickly folded blanket, say, or an inch thick foam block, or ideally a sand bag. Put your left foot back, heel elevated on the support if you’re using one, angled fairly sharply in, right foot forward, turned so your toes point directly at the front edge of your mat. If you feel somewhat unstable, widen your stance side-to-side. Bring your hands to your hips. Have a block on the inside of your right foot, standing at its tallest height.
2. Exhale and turn your torso to the right, squaring the front of your pelvis with the front of your mat. If you’re not using a support under your left heel, you may feel that in squaring the pelvis the left heel lightens on or lifts slightly off the floor. Since the back heel is the anchor in all wide-leg, two-sided standing poses, there are two things you might try to anchor it more firmly. First, draw your pubis to your navel to elevate the front of your pelvis, then press firmly back on the very top of the left thigh. Second, if this helps but doesn’t solve the issue, consider that support recommended above. Once in the ready position, inhale, lean back on your shoulder blades, lift actively through the top of the sternum, and press firmly down on the left heel. Keeping 50 percent of your awareness in that heel, and maintaining the length of the front torso, descend the torso half way to the floor. Be sure you angle forward from the groins, not the lower belly.
3. Ideally, most of your weight is on the left heel, and hasn’t shifted onto the ball of your right foot. If it has shifted, lift your torso slightly, re-affirm the left heel, and return to half way. Imagine that your legs are being pulled straight back to whatever’s behind you, and keep drawing the front of your torso out of the depths of your pelvis in the opposite direction, toward whatever’s in front of you. You may find that your outer right hip has a deep-seated dislike of letting go, and to make it obvious it curls up toward your right shoulder, shortening the right side of your torso, maybe even swinging slightly out to the right, shortening the right side of your torso, and more to the point, your spine. Remember that for a successful twist, the is ideally evenly lengthened front to back and side to side. The solution is to slightly bend your right knee, burrow your right thumb deep into the hip crease, and with your hand spread across the outer hip, push slightly in and slightly back. As you do this, be sure to keep the base of the right big toe firmly pressing the floor. Then in your imagination, draw energetically up along the inner right leg from the ankle to deep inside the right groin.
4. Now with an exhale, begin to rotate your torso to the right, bring the left hand to the block (right hand on the right hip), pressing it firmly with the palm. It’s essential when doing this, that you allow your left hip to release slightly to the floor, so that your pelvis is tilted to the left. The pelvis should always rotate with the rest of the torso in a twist. Come to what you judge to be about three-quarters into the twist and stop. Imagine what happens when you twist a dish towel. It will thicken and so shorten. This same thing often happens to your belly, obstructing the twist. In response, inhale, de-rotate slightly, actively press back on the top of the right thigh, lengthen your belly, and then exhale and rotate again. Do this every few seconds for the first 15 seconds or so in the pose. Then hold as stably as possible for 15 to 45 seconds more.
5. If you feel relatively comfortable, you can lower the block, but only to a height on which you can press your left palm firmly. You always want to be sure you’re pressing your palm to some surface, whether a block or the floor, and not your fingertips. With pressure of the palm on some surface, re-create that same feeling with your left shoulder blade against your back, then lean back slightly.
6. If you’re feeling unstable, it’s probably best to keep your right hand on the hip. Alternatively, you might perform the pose with one side against a wall, right side with the right leg forward, left side left leg. As you twist, lean your hip against the wall to stabilize yourself. However, if you feel safely anchored, you can raise your right arm straight up. Usually students bring their arms perpendicular to the floor, but this should done only when the torso is parallel to the floor. The arms are always arranged perpendicular to the shoulders, not the floor (this is also true for Trikonasana). Inhale to reach the arm up. Then imagine you’re facing a wall (you can actually do this facing a wall) and press the right hand imaginatively into imaginary resistance. Just as you did with the press of the left hand and its shoulder blade, press the right shoulder blade firmly to your back. Then with both shoulder blades pressing your torso, lean back for an upper torso back bend. Be sure not to lean from the lower back, imagine the tail bone lengthening away from the pelvis to keep the lumbar long.
7. This pose is often pictured with the head turned to look up at the top hand. First of all, if you have ANY issues with your cervical spine, look straight forward, DO NOT turn your head. If your cervical is healthy and want to turn your head to the right, you first must be able to elongate the cervical spine evenly, side to side, front to back. DO NOT turn your head if you’re unable to do this; rather, look straight forward and work on proper neck alignment. If and when you rotate your head, your chin should ideally be close to the top shoulder. After all this, if you’re fairly comfortable and anchored, you can lower the block’s height, keeping it high enough so the palm can press it. If you’re feeling adventurous, you can even move the block to the outside of the right foot. After 30 seconds to a minute, to leave the pose, first de-rotate the torso to the starting position and lift up with an inhale. If your back heel is supported, turn both feet forward, and step or hop them together, DO NOT shift forward onto the front foot. If you’re back heel is unsupported, simply reverse the feet. Repeat with the left leg forward for the same length of time.
BEGINNER’S TIP
Sometimes it’s not possible to easily use a block to support the bottom hand. If this is the case for you, position a chair outside your right hip with the front edge of the seat facing toward you (be sure that at least the two front chair feet are on your sticky mat, to prevent the chair from sliding). Exhale and twist toward the chair, but keep your torso fairly upright and bring just your left hand to the seat (you could also brace your right hand against the top of the chair back). Wait for a few breaths, and if comfortable, lay your left forearm across the seat. If your chair seat has the right proportion, and has an open space between the seat and bottom of the chair back, grasp the back edge of the seat and pull the chair to you, bracing the front edge of the seat against your outer leg.
Now if you have trouble with your neck in the pose, and if you have a yoga chair, position it in front of you, with the back of the chair closest. Pad the top edge of the chair back with one or more blankets, and when you move into the pose, lay the bottom side of your head on the support.
Once upon a time, maybe 1,300 years ago, the Alvars were a group of Vishnu devotees living in southern India. The name alvar means “the one who dives deep into the ocean of the countless attributes of god.” One of these devotees, Nammalvar (“my Alvar”), was born into a princely Indian family and given the name Maran. He was, to say the least, a very strange baby, he wouldn’t eat or make a sound or respond to his parents’ words. Distressed, his parents left him at the feet of the local Vishnu idol, hoping the god would intervene. The child, abandoned, got up, settled into the hollow of a nearby tamarind tree, and entered a state of deep meditation. Because of this behavior, it was thought that baby Maran was born enlightened.
Maran probably would have spent the rest of his life meditating in that tree by himself, but he was discovered by a wandering pilgrim who got the boy to speak for the first time in his life. The poetry that was bottled up inside him all those years came pouring out, more than a thousand hymns to Vishnu, the last word of one hymn serving as the first word of the next, which thus made one continuous poem. Here’s an example:
The Paradigm
We here and that man, this man,
and that other in-between,
and that woman, this woman,
and that other, whoever,
those people, and these,
and these others in-between,
this thing, that thing,
and this other in-between, whichever,
all things dying, these things,
those things, those others in-between,
good things, bad things,
things that were, that will be,
being all of them,
he stands there.
His considerable talent for poetry now unleashed, Maran, now Nammalvar, apparently produced over the years a considerable body of beautiful work, something like a thousand hymns. It was so beautiful though that after his death some people feared it would replace traditional teaching, so they tossed it all it a river where, except for just 10 hymns, it was lost to the world.
Or so it seemed. One day, one Natha Muni (Lord of Silence) heard a band of wandering singers recite the 10 surviving hymns of Nammalvar, and as we would say today, went completely bonkers. He asked one of the singers who the poet was, and was told it was Nammalvar. Then Natha Muni asked where he might find the rest of the poetry, and was advised to go to Nammalvar’s home town where he might possibly find someone who could give him more information. So off he went and once there found an old holy man who instructed Natha Muni to sit under Nammalvar’s tamarind tree and recite a prayer in praise of the poet 12,000 times. It’s hard to say how long this took Natha Muni to finish, probably anywhere from a couple of weeks to a few months.
But in the end it worked, and Natha Muni had a vision of Nammalvar, who asked him, “Why are you chanting this prayer again and again?” Nathamuni answered, “I want to know all the hymns you wrote.” As a reward for his devotion Nammalvar taught him not only his own 1000 hymns, but the 3000 hymns written by the other Alvars that had also been lost. He also told Natha Muni that “A great acharya [i.e. teacher] will appear in your line.” After he returned to his own home, Natha Muni became a great teacher in his own right, and authored a book on Hatha Yoga, the Secret of Yoga (Yoga Rahasya), that like Nammalvar’s poetry was eventually lost.
Now jump ahead now nearly a thousand years, to 1888, and the promised birth of that “great teacher” in Natha Muni’s lineage. His name was T. Krishnamacharya, and as an adult he not only changed the course of Hatha Yoga forever. In 1904, at the age of 16, Krishnmacharya made a pilgrimage to the very tamarind tree where Nammalvar recited his poetry and Natha Muni had his vision. There, he too had a vision, this time of his long dead ancestor Natha Muni, who recited to him the lost instruction from the Yoga Rahasya. This book, though not well known today, provided the “seed” for Krishnamacharya’s evolution as a yoga teacher, and though only published recently in English is truly one of the foundation texts of modern Hatha Yoga, along with Iyengar’s Light on Yoga. Want to see a copy of this book? You can order it from the Krishnamacharya Yoga Mandiram at
http://www.kym.org/bookstore/productlisting.php?cid=2
The teenager’s experience was remarkably similar in certain key features to Natha Muni’s: tired and hungry when he reached the temple grounds where the tree grew, TK fell into a swoon and had a “vision” of Natha Muni, who taught him the long lost text of the Yoga Rahasya, the “Secret of Yoga.”
I suspect for many people, the story seems fantastical, and the question immediately comes to mind: did TK really receive this book from Natha Muni? There are plenty of supporters who vigorously insist that he did. A Doctor Varadachari, writing in the YR’s Preface to the first English edition published in 1998, affirms “there is no reason to entertain uncertainty about its authorship,” that it was “God’s will that a descendent of Nathamuni alone should ... discover the work.” But eight years later David Hurwitz, in Yoga Beneath the Surface, a book of interviews he did with one of TK’s longtime students, Srivatsa Ramaswami, presents a different view (presumably with the approval of Mr Ramaswami): “The Yoga Rahasya of Nathamuni is a work by Krishnamacharya inspired by his devotion to the ninth-century yogi Nathamuni.” It seems fairly safe to say that, whatever the back story, ultimately TK authored the YR.

Richard's Asana Breakdown: NAVASANA
NAVASANA (nah-VAHS-uh-nuh)
nāva = boat
The Sanskrit nāva is cognate with the Latin naus, ship, from which we get words like navy, astronaut, and nausea, which originally was a word for seasickness.
There are two versions of Boat in Light on Yoga (hereafter LoY), ardha (are-duh), which means “half,” and paripurna (par-ee-POOR-nuh), which means “full” (purna by itself means “full,” pari is an intensifier, I supppose then paripurna means “full to the brim”). As you may know, most of the 198 poses in the book are given what might be called “difficulty ratings,” on a scale, oddly enough, from 1 to 60, the former assigned to Mountain Pose (tadasana), the latter assigned only to one pose, the antepenultimate, Tiriang Mukhottanāsana, a standing backbend in which the practitioner rounds back and holds her ankles with her hands. Don’t expect this one in the breakdown any time soon.
The Half Boat is rated 2, which makes it seem just one notch up from standing upright. Many of my students may quibble over this rating, at least if it’s held for more than about 15 seconds. The description of Full Boat follows right on the heels of Half, so it has no separate section of its own, and as a result it has no rating.
There are actually two traditional Boat poses, both found in the 18th century Hatha Abhyasa Paddhati and the 19th century Shri Tattva Nidhi. One, Naukasana (nauka means “small boat or “ship”) looks very much like our Half (as illustrated in a 19th century drawing). The difference is that while our Half is performed in LoY with the hands clasped on the back of the head, the practitioner in the older pose has his palms under his buttocks, and so is resting on his forearms. This would seem to make the pose somewhat easier (rating 1½?). The other, Tiryan Naukasana, looks (again from its drawing) something like a shoulder stand with the torso and legs raised to about a 45̊ angle relative to the floor, which gives this pose its name; tiryan means “oblique.” I don’t know if this was ever done, but the former pose could move to the latter and vice versa. From Nauka, the practitioner could roll back onto his shoulders, lift his torso and legs to the proper angle, and support himself with his hands on his buttocks.
Such a sequencing of our two Boats is also possible. In LoY, both Boats begin in Staff Pose, but let’s make it slightly easier and start in Ball Pose (kandukasana) instead. Lie supine on the floor, then with an exhale, curl up into a tight ball: firm your belly, lift your head to your knees, and wrap your arms around your shins. Ideally you should be resting on your sacrum with the rest of your back torso away from the floor.
1. While you continue to squeeze the left thigh to your belly and hold your head to the knee, let go of your right leg and with an inhale, stretch it out, aligning the big toe with your right eye (Quarter Boat?). Press through the heel and base of the big toe, and hold for 15 to 30 seconds, depending on your seaworthiness. When time is up, exhale and draw the right thigh back into your belly.
2. At this point you have two choices. For more challenge (and who doesn’t want more challenge in their life nowadays?), maintain the Ball, and take few breaths before repeating on the left. For less challenge, deflate the Ball and release your torso, head and feet to the floor. Take a few breaths, and then re-inflate. In either case, repeat what you did with your right leg with your left. Try to hold for same length of time you did on the right. Once you’re back in Ball, you again have two choices, maintain or release, prior to doing the complete pose.
3. Now you’re ready to launch your Half Boat. From Ball, inhale and reach out through your heels and again align your big toes with your eyes. Ideally your belly is firm but not hard. There are various ways you can deploy your hands and arms. In LoY, the hands are clasped on the back of the head. If you do this, you can do one of two things: press your hands firmly against the back of your head, which provides some support for the lifted torso, or again for more challenge, just rest them lightly in place. You could also start with firm pressure and gradually lessen it.
You could also stretch your arms (oars?) out toward your feet, more or less parallel to the floor and each other. Again hold for 15 to 30 seconds, breathing as normally as possible, then sink to the floor.
4. Of course you could also enter the pose as described in LoY. Sit in Staff Pose (dandasana), clasp your hands on the back of your head, exhale, and roll back onto your sacrum. No other part of your back torso should touch the floor. As you roll back, simultaneously lift your legs into position and hold for your preferred length of time.
Now for Full Boat
5. Sit in Staff Pose (dandasana). Press your hands against the floor (or blocks) beside your hips, and apply some backward pressure too, as if you’re trying to slide them behind the torso. Use that downward-backward pressure to firm the shoulder blades against your back and lift the top of your sternum straight up.
6. Maintaining the firmness of the shoulder blades and the length of your front torso, lean slightly back onto your tail bone, so that you’re sitting on the “tripod” composed of the tail and your two sit bones. Be sure not to simply slump back.
7. We’ll enter the pose in stages.
a. Bend your knees, touch your feet to the floor, and hold onto the backs of your thighs just above the knees.
b. Inhale, and lift your feet a few inches off the floor. Pull your thighs toward your torso, but at the same time, press your thighs into your resisting hands, so the thighs are held in place between those two pressures. This will further assist the lift of the front torso.
c. Now maintaining the balanced pressure between hands and thighs, inhale and lift your shins parallel to the floor. This may be as far as you can comfortably sail for the time being. Hold for 15 to 30 seconds and release. After a few breaths you might want to repeat.
d. If you want to go farther, inhale and straighten your knees, try to raise the feet sightly higher than your head. Press actively through the heels and big toe mounds.
8. For the full pose, inhale, release your thighs and reach your oars out beside your legs, parallel to each other and the floor. Widen equally across your upper back and chest. Bring your sternum toward your chin and soften your throat. Breathe easily. However far you sail, again hold for 15 to 30 seconds and sink onto the floor. That taste of salt is probably coming from your sweat.
9. There’s actually an exercise that looks a lot like Full Boat but is grouped with the seals (mudra), called Vajroli Mudra. It makes Full Boat slightly easier. It’s described in the 18th century Gheranda Samhita at 3.39 (a different version of this mudra is described in the Hatha Pradipika, it’s NOT the one you want). The torso and legs are arranged exactly as they are in Full Boat, but the hands are pressed to the floor slightly behind the torso, fingers pointing forward. It’s said to “awaken Shakti and bring about long life.” It’s certainly worth a try.
Sequencing the Boats
As mentioned previously, we can sequence these two poses to add to their challenge. Start in Staff and move into Full Boat. Slowly release your torso onto the sacrum, rounding your back, and at the same time, lower your legs to bring the big toes opposite your eyes. Stay in Half Boat for a time that suits you, and then with an inhale, lift back to Full Boat. You can do this several times if you like, holding each position briefly, a sort of yoga sit-ups. End in Staff.
Beginners’ Tips
For many beginning students, the Boats are closer to 60 on the difficulty scale than 2. Don’t despair, props can help. For Half Boat, lie with your shoulder blades on a yoga block or bolster. When you curl up, maintain your contact with the support. You can also or instead support your feet by simply pressing them on a wall, or resting them on some prop. You can start this way, just to get a feel for the pose. Then gradually, over time, rest your torso and/or legs more and more lightly on the support, until one day you’ll be able to sail away from the sup-port and out to sea.
For Full Boat brace a solid chair against a wall and pad the front edge of the seat with a blanket. Then sit a little in front of the chair and lean back against it. From here you can work with your legs as described previously, starting with your feet slightly off the floor and proceeding from there to your capacity. Again, over time, rest more and more lightly against the seat, until you can do without.
Advanced Tip
Want more challenge? OK, perform the Boats with a sand bag held to your chest with crossed arms. Alternatively, do the poses with 2 pound ankle weights wrapped around your ankles.
Our Blog
Check out the latest Articles: