YOGA BLOG
What Moves Us…..

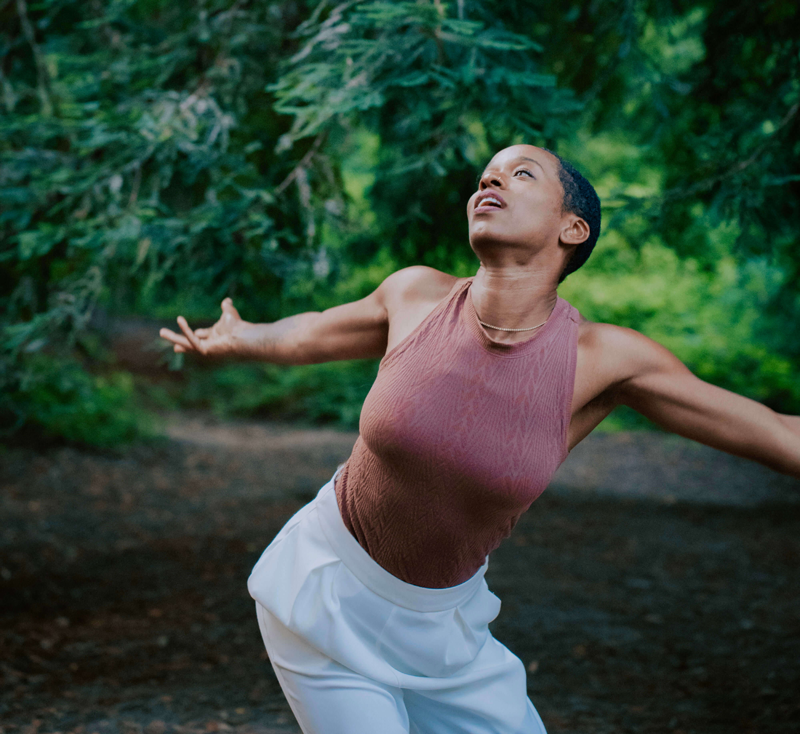
Richard Rosen's Asana Breakdown: ŚIVA NATARAJĀSANA (Lord of the Dance)
ŚIVA NATARAJĀSANA (Lord of the Dance)
śiva (from śī “in whom all things lie,” perhaps connected with śvi “to swell, grow, increase,” compare
with śavas “strength, power, superiority, prowess, valor, heroism,” and śiśvi “swelling or growing
well [in the womb]): auspicious, propitious, gracious, favorable, benign, kind, benevolent,
friendly, dear
nata (from nat): to dance
rāja (from rāj “to rule,” the etymological root of English “royal”): a king, sovereign, chief or best of its
kind
NOTE: the accented ś in the name Śiva is what’s known in devanāgarī, the script commonly used to write
Sanskrit, as a palatal s, and is pronounced like sh.
O body swayed to music, O brightening glance,
How can we know the dancer from the dance?
W.B Yeats, Among School Children (1933)
The story of Śiva is very long and multifaceted, so much so that to go into any detail is unfortunately well beyond the scope of this blog, especially since the primary purpose here is āsana instruction. Let me quote briefly then about Śiva’s dance from German Indologist Heinrich Zimmer’s Myths and Symbols in Indian Art and Civilization (I highly recommend this book, along with his Artistic Form and Yoga in the Sacred Images of India). According to Herr Zimmer, Śiva is the “Cosmic Dancer” who “embodies in himself and simultaneously gives manifestation to Eternal Energy. The forces gathered and projected in his frantic, ever-enduring gyration, are the powers of the evolution, maintenance, and dissolution of the world. Nature and all its creatures are the effects of his eternal dance.”
It might seem that Natarajāsana is an ancient pose, traced back to some hoary yoga text produced countless centuries ago. But, alas, no, it’s origin is found the Yoga Rahasya (Secret of Yoga), written by the “father of modern yoga,” T. Krishnamacharya, probably in the late 1930's, but not published until 1998. The book mentions the name of the pose and includes an accompanying photo, but gives no instruction. For that we need to turn to Light on Yoga (LoY), by B.K.S. Iyengar, Mr. Krishnamacharya’s brother-in-law and longtime student.
Every pose in LoY has a “difficulty rating” (my phrase), except śavāsana, on a scale from 1 to 60, 1 being the easiest, like Mountain Pose (tādāsana), 60 being the most challenging, of which there’s only one in the book, Tiriang Mukhottānāsana (tiriang, reverse or upside down; mukha, face; uttāna, intense stretch, TM), i.e., Upside Down Reversed Face pose. All we have to do is, while standing upright, lean into a deep back bend and hold our ankles (LoY plate 586).
Natarajāsana has the second highest rating at 58, one of two with that rating, the other being the Reversed Locust pose (viparīta śalabhāsana, plate 584). Actually, we’re working here on a simplified version. In LoY, Mr Iyengar has his arms overhead, elbows bent, hands holding the raised foot, which to finish the pose, he draws to his crown. Most students can’t reasonably be expected to complete this particular pose. Mr Iyengar describes Śiva’s dance as a “difficult standing āsana,” a comment known as an “understatement.” In regard to its benefits, the pose “develops poise and a graceful carriage,” strengthens the legs, “expands the chest fully,” and benefits “all the vertebral joints.”
To be honest, this pose was never one of my strong points, and though I sort of, kind of could perform it on a good day maybe 30 years ago in my 40's, at my current age it’s now a moderately fond memory. But even this toned down pose is still a fairly interesting challenge. We’ll give it maybe a 20 or 25 rating.
PREPARATION
As you may be able to tell from the photo, you might not want to pop into the pose as a quick pick-me- upper break from your job or household chores. I recommend you first do some preparatory exercises. You’ll definitely need some thigh and front groin stretches. A bent knee lunge with the focus on the back leg thigh and groin would be a good starter. Be sure to always align the front knee over its heel, slide the back knee back as much as you like. A Half Hero(ine) pose (ardha virāsana) would be useful, especially if you can lean back on your hands or forearms, or even lay your torso on a bolster or the floor. Be sure now to keep the knee in line with the hip. You might also try full Hero(ine), but if you have to sit on a block to perform this pose, I recommend you don’t lie back. You’ll finally want some kind of back thigh/calf stretch, Reclined Big Toe pose (supta pādāngushthāsama) comes immediately to mind.
STAGE 1
1. Stand and face your yoga wall, about one arm’s length away. Brace your left palm against the wall opposite your shoulder.
2. Bend your right knee, bring your heel to your buttock and grip the ankle with your right hand. This is called Foot Restriction pose (pāda pīdāsana).
3. Bend your left elbow and lean forward slightly. As you do, draw your right heel away from the buttock, and raise your right leg to about 45 degrees to the floor.
THINGS TO CHECK ON
Check your standing leg and foot. Has the left knee buckled? Push back on the head of the left thigh bone (femur). Is your pelvis relatively parallel to the floor? It’s possible now that the right hip is slightly higher than the left. An imbalanced pelvis inevitably creates some degree of imbalance in your spine, something you always want to avoid as much as possible. See if you can maintain the angle of your leg while you more or less align the right hip with the left, so the front pelvis is parallel to the floor.
What’s going on with your standing foot? Be sure to keep the mound of the big toe pressed firmly to the floor. And your right shoulder? Your torso may twist slightly to the right as you hold the ankle. This isn’t a big deal, but you can increase the stretch across your right shoulder by firming that side’s shoulder blade into the back. This might turn your upper torso slightly left. Imagine then your right collar bone lengthening away from your sternum.
4. When all these yogi ducks are in a row, start to draw your thigh a bit higher. Keep an eye on that disobedient right hip (figuratively speaking, of course), try to keep it level with the left.
5. Raise the right leg to a comfortable height, parallel to the floor at most, hold for 20 to 30 seconds and release with an exhale. Your full time on this side may be a minute or more. Repeat for the same time and raise the left thigh to approximately the same height as you raised the right. Gradually over time, if possible without strain, increase the height of the raised thigh and the time you stay in the pose.
If you feel confident that you have a handle on the pose, turn around and face away from the wall. If you don’t, however, continue to face the wall and repeat the pose with support. If you’re not quite sure where you are on the confidence spectrum, continue to face the wall, except back away until the fingertips of your outstretched hand just barely touches the wall. Then do the pose as described in Stage 2 with no support, just knowing that it’s there to fingertip in a pinch.
STAGE 2
Now without the wall as a support, re-create the pose. To help with balance, you may not want to raise your free arm until you begin to raise the thigh. Lift the thigh slowly, if you can’t quite raise it parallel to the floor, be satisfied with whatever height you reach. Remember to press the mound of the standing foot’s big toe firm to the floor. Hold for 20 to 30 seconds and release with an exhale, repeat on the second side.

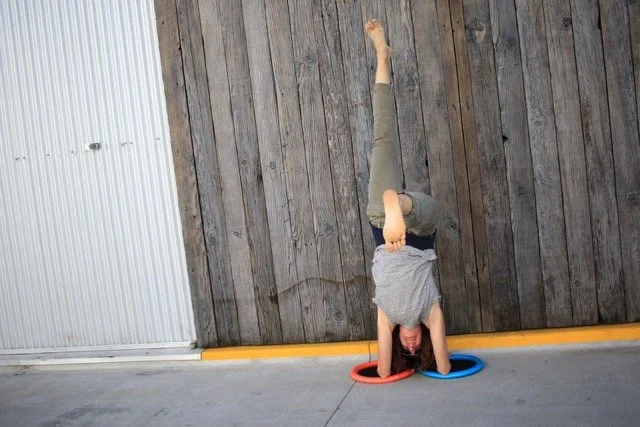
Richard Rosen's Asana Breakdown: Couch Posture
PARYANKASANA (Couch posture)
paryanka = a bed, couch, sofa, litter, palanquin; a particular mode of sitting on the ground (a squatting position assumed by ascetics and Buddhists in meditation); a cloth wound round the back and loins and knees while so sitting (from the Monier Monier-Williams Sanskrit-English Dictionary, 1899).
Three hundred years ago, give or take a few decades on either side, the posture we know as Urdhva Dhanurasana was called Paryankasana. Then, sometime between the mid-eighteenth and mid-twentieth centuries, the name Paryankasana was co-opted for a different posture. This isn’t unusual in the 600-year history of Hatha Yoga (technically it’s older, but that’s another story). The same was done to the names of traditional postures like Garudasana and Kurmasana. Both originally were upright sitting postures, now the former is a standing, pretzel-like position (unsalted), the latter a deep sitting forward bend.
But the name Paryankasana isn’t applied universally to the modern posture. Several instruction manuals name it Supta Vajrasana, the Reclining Thunderbolt Posture. I also found one book that used Paryankasana to name a posture that’s completely different from the one we’re breaking down. The Iyengars call this posture Bhairavasana, bhairava meaning “frightful, terrible, horrible, formidable,” one of the eight aspects of Shiva. If we look at a photo of the posture, it seems to embody each of those four words. This Couch consists of hooking one leg behind the neck, then lying supine on the floor, free leg extended along the floor, and hands in anjali mudra (see Light on Yoga, plate 375). This once again illustrates that there’s no ultimate standardization of names and asanas in Hatha Yoga. Over the centuries, the same asana might be re-named, its original name transferred to a different asana, or two different asanas at different times have the same name.
What does our Paryankasana look like? If you’ve ever done Matsyasana (Fish Posture) as a counter to shoulder stand (see Light on Yoga, plate 113), then you have a pretty good idea of the Couch. The difference between the two postures is in the position of the legs: the Fish legs are in Lotus (Padmasana), the Couch legs in Hero(ine) (Virasana) (see Light on Yoga, plate 97). Modern Couch, like the original posture with this name, is a backbend. But instead of being supported on hands and feet like Urdhva Dhanurasana, Couch is a sitting posture supported by the seated pelvis on one end and the crown of the head on the other. To complete the posture, the forearms are crossed and passed overhead.
PREPARATION
Let’s start with an easy variation to get a preliminary feel for the posture, and see where we can reasonably go from there. To do this, you’ll need two foam (or cork) blocks or something like them. We’ll start with the legs stretched out along the floor, the torso and head supported on the blocks.
Lay one block on your mat at its lowest height to support the lift of your chest. The second block is for the back of your head. Lie back on the first block, its long axis across your shoulder blades (scapulas). Start a little below where you want to end up, and with your feet on the floor, push yourself across the block. Ideally this will slide you a little more onto the block and, at the same time, draw the scapulas very slightly down the back. The second block should be positioned on one of its sides, its middle height, with its long axis parallel to the spine. Have about 3 to 4 inches of the block projecting sbove your head.
Now raise your arms perpendicular to the floor and imagine that, instead of being anchored in the scapulas, they’re rooted in the spine between those bones. Slowly rock from side to side, widening across the back by reaching upward, then cross your forearms over your chest and hold the outer arms. As you continue to widen across the back, hug your arms against your torso to “contain” the widening. The inner body always wants to expand (Shakti) and dissipate into the universe, the outer body wants to contract everything into dense minuscule point (Shiva), so between the two we can feel our body vibrating with life.
What would you like to do with your arms? Lay them passively to your sides is the easier option. But for a better sense of the full pose, cross your forearms, hold the elbows, and with an inhale, swing them overhead, resting them on the ledge of the block’s projection.
Next press your feet against the floor, inhale, lift your pelvis slightly off the floor and reach your tail bone away from the back of your pelvis. This helps to lengthen your lower back and prevent it from over- arching. Then exhale and lay your pelvis back down on the floor, maintaining the long lower lumbar.
You can, if you care to, keep your knees bent, feet on the floor. Just be sure to keep the thighs parallel (you can put a block between the thighs to help with that). You can also straighten your legs, do this in the following way. Inhale and stretch out through the right heel. Keep your heel maybe three or four inches off the floor. Imagine reaching along the back leg from the tail through the heel and rotate the hip so your toes point to the left. Keeping your heel off the floor at the start helps to lengthen and rotate leg. Then exhale and press your leg down firmly on the floor. Repeat with the left leg, except rotate your hip so your toes point right. When both legs are on the floor, keep them firm with that slight inner rotation. This, along with the lengthened tail, will protect your lower back.
Close your eyes, and in your imagination, find the back of your sternum (inside the thorax) and direct your inhales into that spot, each one opening your chest a bit more. On the exhales, imagine sinking onto the block as if it were deepening your scapulas into your back. Inhales create space, exhales create release. Here we have the third essential component of the work of the scapulas (and the sacrum as well): physically down and across the back, imaginatively deepening into the back.
Now as you press out through your heels, find your inner ankles, and in your imagination, draw energetically up along the inner legs to the base of the pelvis. At that point, the two imaginary lines along the inner legs combine into one line which passes through the core of your torso, along the imaginary front spine, between the hemispheres of your brain and out through the crown. In Western anatomy this is the area called the fontanelle, the “little fountain,” but in yoga it’s called the brahma randhra, the “aperture of brahma.” This line of imaginary energy terminates about a foot above your head at the dvadashanta, the “end of 12,” (i.e., 12 finger widths above). As your press from your tail through the backs of your heels, watch the opposing “energetic” lift through the body and out. Stay for at least a minute, two to five would be ideal, and when you’re ready to exit, roll to one side with an exhale and a slight groan.
STAGE 2
If you want to continue, there are two choices. If you want to try the full pose, you should be able to sit easily in Hero(ine). By “easily” I mean with your bottom on the floor between your feet, and not on a bock. If this isn’t possible, then sit on the floor with legs extended forward as in Stage 1. If you have a heavy (i.e., sand) bag, in whichever way you’ve placed your legs, you might lay it across the topmost part of yout thighs, right where the thighs join the pelvis.
Now inhale and lean back on your forearms, then slide your hands under your buttocks, palms down. To bring your head back, be sure to NOT simply scrunch the base of your skull on the back of your neck, which could lead to many unforeseen and largely unpleasant issues. Rather, press your forearms/hands against the floor, lift the top of your sternum toward the ceiling by pressing your shoulder blades against your torso (as if still lying on the block). Carefully bring your head back from the root of the neck, which is deep inside your upper back between the scapulas. The spine ideally should create a smooth, even arch from the pelvis to the crown. At first, just touch your crown lightly on the floor, don’t put a lot of weight on your neck. If your head doesn’t rest easily on the floor, support it with a block or thickly folded blanket. Don’t let it hang in space.
It might be best to keep the forearms and palms on the floor, bringing them overhead at this point may bring too much pressure on your neck, never a good idea. Stay for 30 seconds when beginning, increase the time if you like as you become more comfortable in the posture. To come out, press your hands firmly to the floor and with an exhale, lift the sternum, allowing your head to follow the torso.
If you practiced stage 2 with legs straight forward, experiment every now and then while sitting in Hero(ine). If you did this stage in Hero(ine), I’m reluctant to suggest you bring the arms overhead. If you want to do that, think it’s best if you first consult with your regular teacher to ascertain if your neck is ready, and how to get it ready if it’s not. Please be careful with your neck.
Like the Fish Posture, Couch is a reverse stretch for your neck after shoulder stand. It’s obviously a chest opener and a back strengthener. It also stretches/strengthens the neck.
CAUTIONS ON EXITING VIRASANA
When you’re ready to exit Virasana, take hold of the ankle and pick the leg up, keeping the knee completely flexed. Stand the foot on the floor, then release the knee off to the side onto the floor. The thigh will now be angled away from the pelvis. Without changing that angle, slowly straighten the leg, and once straight, swing it in front of the torso. This assures that there’s minimal rotation in the knee, which is a hinge joint, and centers it all in the hip, a rotary joint.
A SIDE NOTE
If you read the definition of paryanka at the head of this breakdown, you might have wondered about the squatting ascetics and why they wound a cloth “round the back and loins and knees while so sitting.” We might assume that yoga props are a modern invention, and that’s true for many but not all props. Yogis were hanging from ropes tied to tree limbs in the eighteenth century (see the Hatha Abhyasa Paddhati, 94- 102). The cloth referred to here was like a modern strap long enough to, in a squatting position, wrap around the torso and shins. If you want to understand what this was like, get a long yoga strap, I’d say at least eight to 10 feet. Buckle the strap into the largest loop you can make, then sit with your thighs tucked up to your belly, shins crossed, and feet on the floor (if your tail bone sinks toward the floor, be sure to sit on a height high enough to bring the pelvis to neutral. Loop the strap around your torso and shins, and snug it. The purpose of the strap is to create support for the back torso to make a long sitting session easier. The drawing I have of a sitting figure wrapped in the long cloth belt shows their arms also inside the loop. How they managed to tie the loop with their arms in the loop is anybody’s guess.

Standing Pigeon with Support By Leslie Howard
Standing Pigeon with Support
(Eka Pada Rajakapotasana Variation)
By Leslie Howard
Preview: This pose is more commonly practiced on the floor. But the standing variation can be more effective for the hip, as well as more accessible for folks with knee issues. It also helps keep the spine closer to neutral rather than rounding the lower back. This pose opens and lengthens the pelvic floor muscles and is a deep stretch for the hip rotators (outer hips).
Props
• Chair or table (kitchen table height works well) • Bolster
• One to three blankets
How to Practice
If using a chair, set it up so that the bolster sits across the seat of the chair the long way. Use two bolsters or enough folded blankets so that the stack is approximately the height of the hip joint.
Stand in mountain pose in front of your chosen leg support (the chair with bolster, a table).
Keep the left leg in mountain pose.
Bend the right knee in front of the chest and turn the right femur out.
Place the entire lower leg on the table or the bolster and blankets on the chair seat. If possible, keep the knee in line with the hip socket.
Keep the right shinbone parallel to the floor. If the knee is higher than the foot, place extra support under the knee. The shin and thigh of the raised leg should be as close to 90 degrees as your hip socket will allow.
If you can go farther, hinge at the hips and bend forward. Keep the spine in neutral without the back rounding.
Place the hands on the chair back or table surface and elongate the front of the spine as you come forward.
Stay in the pose 1–2 minutes, then change sides.
Modifications
If you experience any knee pain in the bent leg while practicing this pose, use your hand to externally rotate
the thighbone more or put support under the outer knee. Alternatively, place a rolled up washcloth behind your knee.The height of the support is determined by the height of your pelvis when standing. You can build up the table height with blankets if you are taller or stand on a yoga block if you are shorter.
If you are using the chair variation, you may want to wrap the bolster in a yoga mat to reduce the possibility of it slipping.
Focused ActionsStrongly flex the bent-leg ankle (this helps protect the knee also), so that the outer ankle doesn’t overstretch.
If you bend forward bring the bent leg hamstring into the sitting bone.

Richard Rosen's Asana Breakdown: EKA PADA RAJAKAPOTASANA I
EKA PADA RAJAKAPOTASANA I (One Foot King Pigeon Posture)
eka = one
pada = foot
raja = king
kapota = pigeon
The Sanskrit word for “bird” is khaga, literally “moving (ga) through air or space (kha).” While not forgetting members of the avian family like ostriches and penguins, the fact that most birds can fly makes them the perfect messengers for the gods living in the heavenly realms when they want to contact us mere mortals down here on earth. Since they can enter and leave those realms at will, birds know secrets of which humans haven’t a clue. This is especially true for the crow, who holds the three greatest secrets: the secret of immortality, the secret of creation, since she was there to witness it, and the secret of the underworld, where she resided for many years. As a result, the “science of the crow” (vayasa vidya) developed around her and became a popular course of study. Based on her flight patterns and the sound of her cawing, “crow scientists” could determine certain significant omens.
Birds also serve as “mounts” (vahana) for the gods. Sarasvati, the “flowing one,” the goddess of speech and learning (who invented Sanskrit) rides on a peacock, Laksmi, the goddess of wealth, rides an owl, Vishnu, the Preserver, one of the three deities of the Hindu Tirmurti (sort of akin to the Christian Trinity), rides an eagle, and Brahma, the Creator, a second member of the Trimurti (Shiva is the third), rides a wild gander. Like the crow, the gander (hamsa) inspired an elaborate mythology because he could live anywhere in the world without attachment, in the sky, on the water and land. He became a natural symbol of the yogi, the homeless wanderer, free of any worldly connections. The gander’s Sanskrit name conceals a profound secret that, as the Sufis say, is hidden in plain view, the unspoken (ajapa) mantra. Reverse the syllables and we get sa’ham, meaning “that” (sa), the Absolute or Brahman, and “I am” (aham), rendered “I am that”; in other words, the embodied Self, the jivatman, is at one with the great Self, the paramatman or Brahman. From the moment we’re born to the moment we pass away, we’re reminded of our identity with the Absolute with every breath we take: a hissing “sa” sound on the inhale, an aspirate “ha” sound on the exhale. Sit in some quiet place, close your eyes and listen to your breathing. Hear it?
After many long hours of research, I sadly failed to find anything very exciting about the pigeon. Mr Iyengar says the posture is so named because the chest is puffed up like that of a “pouter pigeon” (LoY, 389). I discovered a hand mudra, kapota mudra, demonstrated in The Mudras of India, by Cain and Revital Carroll. The mudra looks a lot like anjali mudra, except the hands are cupped together. One benefit, according to the authors, is that it can be used to “cultivate humbleness and inward reflection,” two qualities our world could use more of right now, except of course at the Nest. It can also be used to “dispel anxiety and coldness” simply by “separating the hands quickly and repeatedly forming the gesture.” I can’t vouch for this personally (but in a nice touch, the mudra is found on page 108).
Now for the posture. It’s possible you may need some kind of buttock support, like a blanket, and
it’s likely you’ll need a strap. We were sternly warned in teacher training not to do this posture without first stretching the outer hips (but that was 40 years ago and times have changed), and of course warming up for the backward extension, which would include preliminary exercises for stretching the chest, armpits, and front groins. This is the first of four rajakapota variations (as indicated by the Roman numeral I) in Light on Yoga. As is typical in this book, the first posture in any series is always the “easiest,” though as we all know, “easy” is a relative value. LoY gives every posture (except shavasana) a “difficulty rating number,” which is on a scale from 1 to 60. In this system, our posture 28, II is 29, III is 30, and IV jumps to 40. Be forewarned though, this book was published in 1966, and the ratings are often a bit on the low end.
If you’re in any way limited in backbends, which I assume many of us are, loop the strap around your left foot and snug it, with the buckle on the sole side. From Downward Dog (adho mukha shvanasana), inhale and bring your right knee just to the outside of your right wrist, cross your lower leg diagonally under your torso, and lay the left leg on the floor with the strap alongside it in easy reach. If your right buttock doesn’t sit comfortably on the floor, put some support below it, like a blanket or foam block. Then check the back leg. Make sure it’s reaching straight back from your pelvis, with the center of the kneecap and the little toe side of the foot squarely on the floor. This imparts a slight inward rotation of the left thigh bone (femur), which in turn protects the lower back.
Adjust the right foreleg according to your ability. If you need a support for the buttock, it’s probably best to position the right heel just in front of the left hip. If your buttock rests comfortably on the floor, you can increase the challenge–not that this pose isn’t challenging enough as it is–by moving the foreleg forward somewhat, heel away from hip.
Now exhale and lay your torso down on your inner right leg. From your lower back ribs, extend your arms as far forward as possible, and from your tail bone, extend the left leg in the opposite direction, as far backward as possible. In doing this, lengthen the sides of your torso and especially your armpits and groins as much as you can. Imagine you’re dividing yourself in half around the waistline. Every now and then lift your torso slightly with an inhale, draw your belly out from the depths of the pelvic bowl. Then with an exhale slowly spool your front torso back down on the thigh, lower belly touching first, then the upper, and finally the ribs. Continue for a minute or two.
When you’re ready to raise your torso, there’s a very specific way to do that. Try NOT to push your torso up using your hands, that usually tends to compress the lower back. Instead, inhale, and try to lift your torso to upright by drawing your tail bone down toward the floor, this will help keep the lower back relatively extended. You might raise up (inhale) and lie down (exhale) a few times to make sure you have the feel of the tail’s action. The lengthening of the coccyx in this way is applicable to every back extension.
When your torso is raised, bend your left knee. Notice if the knee slides out to the left a bit, and if it does, try to bring it back to the right and more in line with the hip. Then firmly take hold of the strap in your left hand, stretch your arm toward the ceiling, and raise the right arm and take hold of the strap in both hands.
Depending on your flexibility, you’ll find yourself at or somewhere in between two extremes. At one end of these two, you can bend your elbows and gently walk your hands along the strap toward the foot. At the other extreme, your arms are nearly straight and your left foot seems about 108 miles away from your hands. In either case, DON’T PULL ON THE STRAP to deepen the posture. The strap is a guide for your hands and a means to keep your foot in place, not the rope in a tug-of-war between your arms and left foot. When the strap is first in both hands, pause briefly and bring your breath into the foreground of your awareness. Allow the inner right groin to deepen into the pelvis, feeling the front groin on the left side lengthening as you draw your pubis toward your navel to SHORTEN the lower belly. This may seem like just the opposite of what you want to do, but it’s not. Also bring your front ribs down and into your torso, so that you’re actually slightly closing down your belly. To see what this ideal looks like, go to Mr. Iyengar’s picture in LoY, plate 539, just as he’s prepping for the posture. Notice the smooth curve of his front torso, as if someone drew a half circle with a compass. Then re-create those two actions you learned in the reclining warm-up: from your lower back ribs, lift through the TOP of the sternum (manubrium) and your elbows, lengthening the armpits, but keeping them deep, and descend through the tail bone into the floor. “Backbend” is something of a misnomer, we’re not “bending back,” we’re lengthening back, relying on the length of the groins and armpits to create the final posture.
As I mentioned, walk your hands LIGHTLY along the strap. Remember, the foot is not the goal; in fact, in some ways it’s best not to have a goal. Yoga asanas are chock full of surprises, and sometimes goals are limiting, channeling your attention in one direction and missing other possibilities.
Every so often we see a picture of a student in what seems like an all-pro back bend. Check the lower back though, and you might notice there a deep arch. This tells us that the extension is concentrated in the lumbar, which isn’t ideal. In every back extension you’re working to create an even distribution of that extension all along the length of the spine, including both the thoracic and cervical spines. In the best of all possible worlds, every asana should create more space in the body-mind, not less. The “full posture” for you is where you can get to comfortably. However, as Mr Krishnamacharya said, Today’s maximum is tomorrow’s minimum.
If you don’t get very far along the strap, it might be best to keep your head fairly neutral. If you do take your head back to look up, remember that the cervical spine should feel like a natural extension of the thoracic spine. Be sure not to simply drop your head back from the base of the skull, that inevitably compresses your neck. Instead take your head back from its “energetic root” between the shoulder blades (it’s important to distinguish between the base of the neck and its root. The former is the seventh cervical vertebra, the latter is an imaginary point between the shoulder blades).
Watch your breath very closely. There’s a strong inclination in these deeper “adult” back extensions (e.g., as opposed to the “babies” like Locust, shalabhasana) to push to extremes (“gotta get that foot”), causing the throat to grip and breath stop. Avoid this as much as possible, breath holding can lead to unpleasant results, including booming headaches.
Some students may be able to take the foot, most others will need to continue to hold the strap. After all this mishegas (a Sanskrit word borrowed from Yiddish meaning “craziness”) you’ve gone through getting to this point, you might as well stay for at least 30 seconds. Release with a gratified exhale, step back to Downward Dog, take a few breaths then kneel down to switch the strap to your right foot, and repeat with the other side for the same length of time. As one of my teachers always said, be thankful you don’t have three sides.

Richard's Asana Breakdown: PARŚVOTTANĀANA
PARŚVOTTANĀANA
parśva side, flank
uttāsna stretched out, spread out, lying on the back
āsana seat
As you can see, the Sanskrit word parœvottanâsana is composed of three smaller words, parśva, uttāsna, and āsana. We’re all quite familiar with this last word, āsana, which nowadays is typically rendered as “pose” or “posture,” but which, you may know, literally means, “seat” (derived from the verb ās, “to sit”). That little horizontal line above the the initial ā, called a macron, indicates it’s a long (as opposed to short) a. This means it takes the emphasis in the word, so it’s pronounced AH-sun-uh.
Now what about those other two words, parœva and uttāsna? The accent mark above the first word’s s makes it a palatal s, so is pronounced like sh, parsh-vuh. Uttâna, you can see, has another long â, and so is pronounced oo-TAHN-uh. You may then notice something odd about the word parœvottanâsana. Where does that o near the middle come from, there’s no o in any of the three composite words? In Sanskrit several words are often blended into one word, as here. This blending is called a “junction” (sandhi), and there are a host of rules governing this process. It sometimes results inextremelylongwordswithnobreaks, and unless you can decipher the sandhis, good luck understanding what’s being said. The sandhi here is very common: when the final a of a word, like parœva, is immediately followed by a word beginning with u, the two vowels join and an o is born. This is the same sandhi we see in the three letters of aum, which becomes om.
I bring this up because we live through sandhis every day of our lives, at least two, sometimes, depending on the source, three or four. These are the times of transition between darkness and light, dawn, and light and darkness, sunset (sometimes noon and midnight are added). It’s said that these are the most propitious times of the day to practice, when the balance between external light and dark is believed to have a sympathetic balancing effect on the energies of our body, a highly desirable state for yoga practice.
In the Iyengar system parœvottanâsana is performed as part of a very simple vinyasa, moving from the first side to the second by swinging through prasârita pâdottânâsana (notice the o in the second word, it’s the result of a sandhi between pada, “foot,” and uttânâsana, the name given to the basic standing forward bend). I’ll describe this movement at the end of this article.
One more thing to know about the customary way this pose is performed concerns the position of the arms and hands. You likely know that when we press our palms together and rest our thumbs lightly on the sternum, it’s a gesture know as anjali mudra (there’s actually a second way to make this gesture, with cupped palms turned up and the little finger sides of the hands touching). In Iyengar land, the hands in parœvottanâsana are brought into anjali behind the back, known as pooþhânjali mudra, pooþha meaning the “back of anything” (pronounced something like prish-tah). This position is difficult, not to mention painful, for a majority of students. Nest Yoga strongly believes “No pain, lots of gain ,” so you have two options for the arms: keep them free and put
them on the floor–or on blocks, if needed–or cross them behind your back, holding the elbows. If you do the latter, swing them back on inhales, noticing which arm is higher. This is your habitual cross, which you should change on the second side.
PRELIMINARY
The distance between your feet in this pose can vary depending on your level of experience. If you’re a relative yoga rookie, you might want to keep your feet fairly close together, maybe about two feet, give or take a few inches depending on your height. The pose will be a bit easier. If you have more experience under your belt, or are a daredevil rookie, then move your feet about three feet apart, a few more inches if you’re taller.
Since you’ll be turning your torso to face over the forward leg, the back foot is turned in rather sharply, more so than Triangle Pose, for example. The attempt is made to square the front of your pelvis with the front of the mat. New beginners might need some help doing this, though more experienced students who are tighter in the hips and groins will experience a similar limitation. The best approach here is to position a lift under the back heel, like a thickly folded blanket or better yet, a sand bag (40 years ago the bags were indeed filled with sand, but no longer today).
When you rotate your torso over the front leg, two things might happen that will need your attention. The back heel, in response to the turn of the hip, might lose a bit of its contact with the floor/support. In this case, as the hip comes forward, you’ll need to push actively back, away from the front edge of the mat, with the top of the front thigh and draw the pubis to the navel. This should help to somewhat free the groin. The back heel, in most of the two sided standing poses, provides your anchor to the earth. If you lose that, the pose will likely be, to some degree, unstable, which diminishes the sense of rootedness, one of the important benefits of standing poses. The second issue, though not quite as common as the first, occurs when you draw back on the front leg hip. This sometimes results in a loss of full contact of the base of the big toe and the floor, another destabilizing action. So as you draw the front hip back, it’s necessary to plant the mound of the big toe firmly into the floor. As you might notice, the work of the heels and big toes counter the movement of the pelvis.
PRACTICE
So start this with the right foot forward, left foot back, with a distance between them that suits you best. Turn your torso to the right, monitoring the left heel and the base of the right big toe. If you feel that it’s difficult to ground the left heel, put some height below it. Then inhale and lean back, affirming the contact of the left heel with the floor or support, and maintaining that awareness, exhale and lengthen forward. Remember, all forward bends are rooted in the groins, not the lower belly. So as you descend into the fold, preserve the space between the pubis and navel, periodically lifting slightly out of the fold to re-affirm that space. For this time, align the mid-torso over the inner right leg so it’s a straight forward bend (it’s also possible to align the mid-torso over the middle of the leg, adding a slight twist to the pose).
Check the angle of your pelvis and the feeling of the right groin and hip. It’s not uncommon for
the front leg hip to tilt down slightly, and at the same time “bunch up,” shortening the right side of the torso. If your hands are free, bend the right knee a bit and press your right thumb into the hip crease, then push back as firmly as you can. Remember to keep the mound of the big toe glued to the floor. Then if your hands are on some support–the floor or blocks–actively push them into the support and back toward the back foot. From this downward, backward pressure, draw the belly out a little farther, pretending that it sits deep in the pelvis like an egg in an egg cup. If your arms are crossed behind, be sure NOT to lift the elbows away from the back torso. Instead push them firmly against the back and lift the front shoulders upward.
In your imagination, draw “energetically” up from the big toe mound to the inner right groin. Then draw that groin deeper into the pelvis to encourage the lengthening of the belly. Keep your head in a neutral place, looking at the front leg. Stay for 30 seconds to a minute. When ready to exit, come up on an inhale with a long front torso, pulling down on the tail bone to initiate the move from the base of the pelvis. Once upright, be sure NOT to shift forward onto the right foot to bring the feet together. Instead, turn your feet parallel to each other, then turn them for the second side, right foot in, left out, and repeat the relevant instructions. Be sure to time yourself so that you stay for equal lengths of time on both sides.
THE VINYASA
After finishing the pose to the right, exhale, maintain the forward fold and swing your torso to the left. As you do, reverse to position of the feet, right foot in, left out. As your torso reaches the left leg, inhale and lift to upright (you won’t be able to do this if your back heel is supported). Quickly repeat the preparations for the pose and come down on the exhale. Stay for the same length of time as you did on the right, then exhale and swing to the right, stopping in the middle between the two sides. If your arms are crossed behind, you’ll be more or less in prasârita pâdottânâsana 2, if your hands are free, prasârita pâdottânâsana 1. Stay for as long as you like, then press your hands to the floor under your shoulders (uncross them if need be) and step or hop your feet together. As always, ascend with a long inhale, pulling down through your tail bone.
Our Blog
Check out the latest Articles: