RICHARD ROSEN'S ASANA BREAKDOWN - MATSYASANA

shutterstock_552386257.jpg

MATSYASANA

(mot-see-AHS-anna) 

matsya = fish 

Fish Pose is a traditional asana. It’s described in the late 17th century Hatha text titled Gheranda’s Collection (Gheranda Samhita, see 2.21). For a very long time I tried but couldn’t figure out why the pose is supposed to look like a fish. Then one day I ran across this comment in Popular Yoga Asanas, by Swami Kuvalayananda: “The pose is called Matsyasana because in swimming a person can float on water, like a fish, for a considerable time, if he steadily lies there in this posture.” (pp 67-8) Actually a person can float in water for very long time in any position, so I don’t find Swami K’s explanation credible. The mystery of the pose’s name continues. 

Be that as it may, there seem to be two slightly different ways this pose can be performed. In one version the torso is lying flat on the floor with the arms crossed overhead. In the other version, the torso is arched off the floor, braced between the buttocks and the crown. In either case the legs are described as being in Lotus (padmasana). For safety’s sake, we’ll pass on Lotus and either have the knees bent, feet on the floor, or legs extended and resting on the floor.

1. Lie on your back on the floor with your knees bent, feet on the floor. Inhale, lift your pelvis slightly off the floor, and slide your hands, palms down, below your buttocks. Then rest your buttocks on the backs of your hands (and don’t lift them off your hands as you perform this pose). Be sure to tuck your forearms and elbows up close to the sides of your torso. 

2. Inhale and press your forearms and elbows firmly against the floor. Next press your scapulas into your back and, with an inhale, lift your upper torso and head away from the floor. Then release your head back onto the floor. Depending on how high you arch your back and lift your chest, either the back of your head or its crown will rest on the floor. 

3. You can keep your knees bent or straighten your legs out onto the floor. If you do the latter, keep your thighs active, and press out through the heels. 

4. Stay for 15 to 30 seconds, breathing smoothly. Then with an exhale lower your torso and head to the floor. Draw your thighs up into your belly and squeeze. 

5. Remember that there’s an alternative, which is to lay the torso on the floor, with no back bend. 

Benefits

Stretches the deep hip flexors (psoas) and the muscles between the ribs

Stretches and stimulates the muscles of the belly and front of the neck 

Stretches and stimulates the organs of the belly and throat

Strengthens the muscles of the upper back and back of the neck 

Improves posture

Life is like a box of ..... Crayons!

shutterstock_133494020.jpg

by Kim Lally

It’s that time of year - September (well, actually August), when school starts and it feels like a new beginning. Different from a New Year’s new beginning - which often focuses on wellness- this beginning is often about intellect. Or education. Or purpose.

If you have children who go back to school, summer is over and your daily rhythm shifts. If you have children who leave the ‘nest’, you grapple with a different daily shift that may feel scary and rife with longing and reflecting. Even if you don’t have children of your own, you were once a child in school - and maybe you still feel that slight shift of rhythm at this time of year. Remember new school shoes or a lunchbox? Shopping for fresh new notebooks? A fresh box of crayons? 

A few days ago, a teacher of mine opened a big box of 64 crayons and asked us to ‘just smell’. That smell transported me back many years to a wooden desk with a piece of blank newsprint, a fresh box of crayons with those perfect tips, and finding that favorite color  - carnation pink, burnt sienna, gold... Ah, the wonder of what you would put on that page. Where to start? What color to use? What could or would it become?

This September, (or August), let’s try it. Buy a box of crayons -even just a small one. Get out a blank sheet of paper. Open the box and deeply sniff. Gaze at the empty page. And start drawing. 

Don’t focus on the outcome. Rather watch each mark, each color, each step. For each step is as important as the finished product. And, maybe, just maybe… as you take each step, a new pursuit may call to you. Learn a language? Read a mystery? Learn to cook Thai food? Start yoga? With each mark on that blank page, something may begin to call you to ‘try me’ this fall.

What if you just did it? Opened your heart, braced yourself and started something new? Use the thrill of a box of new crayons to get started. And see what comes. 

If not now, when? 

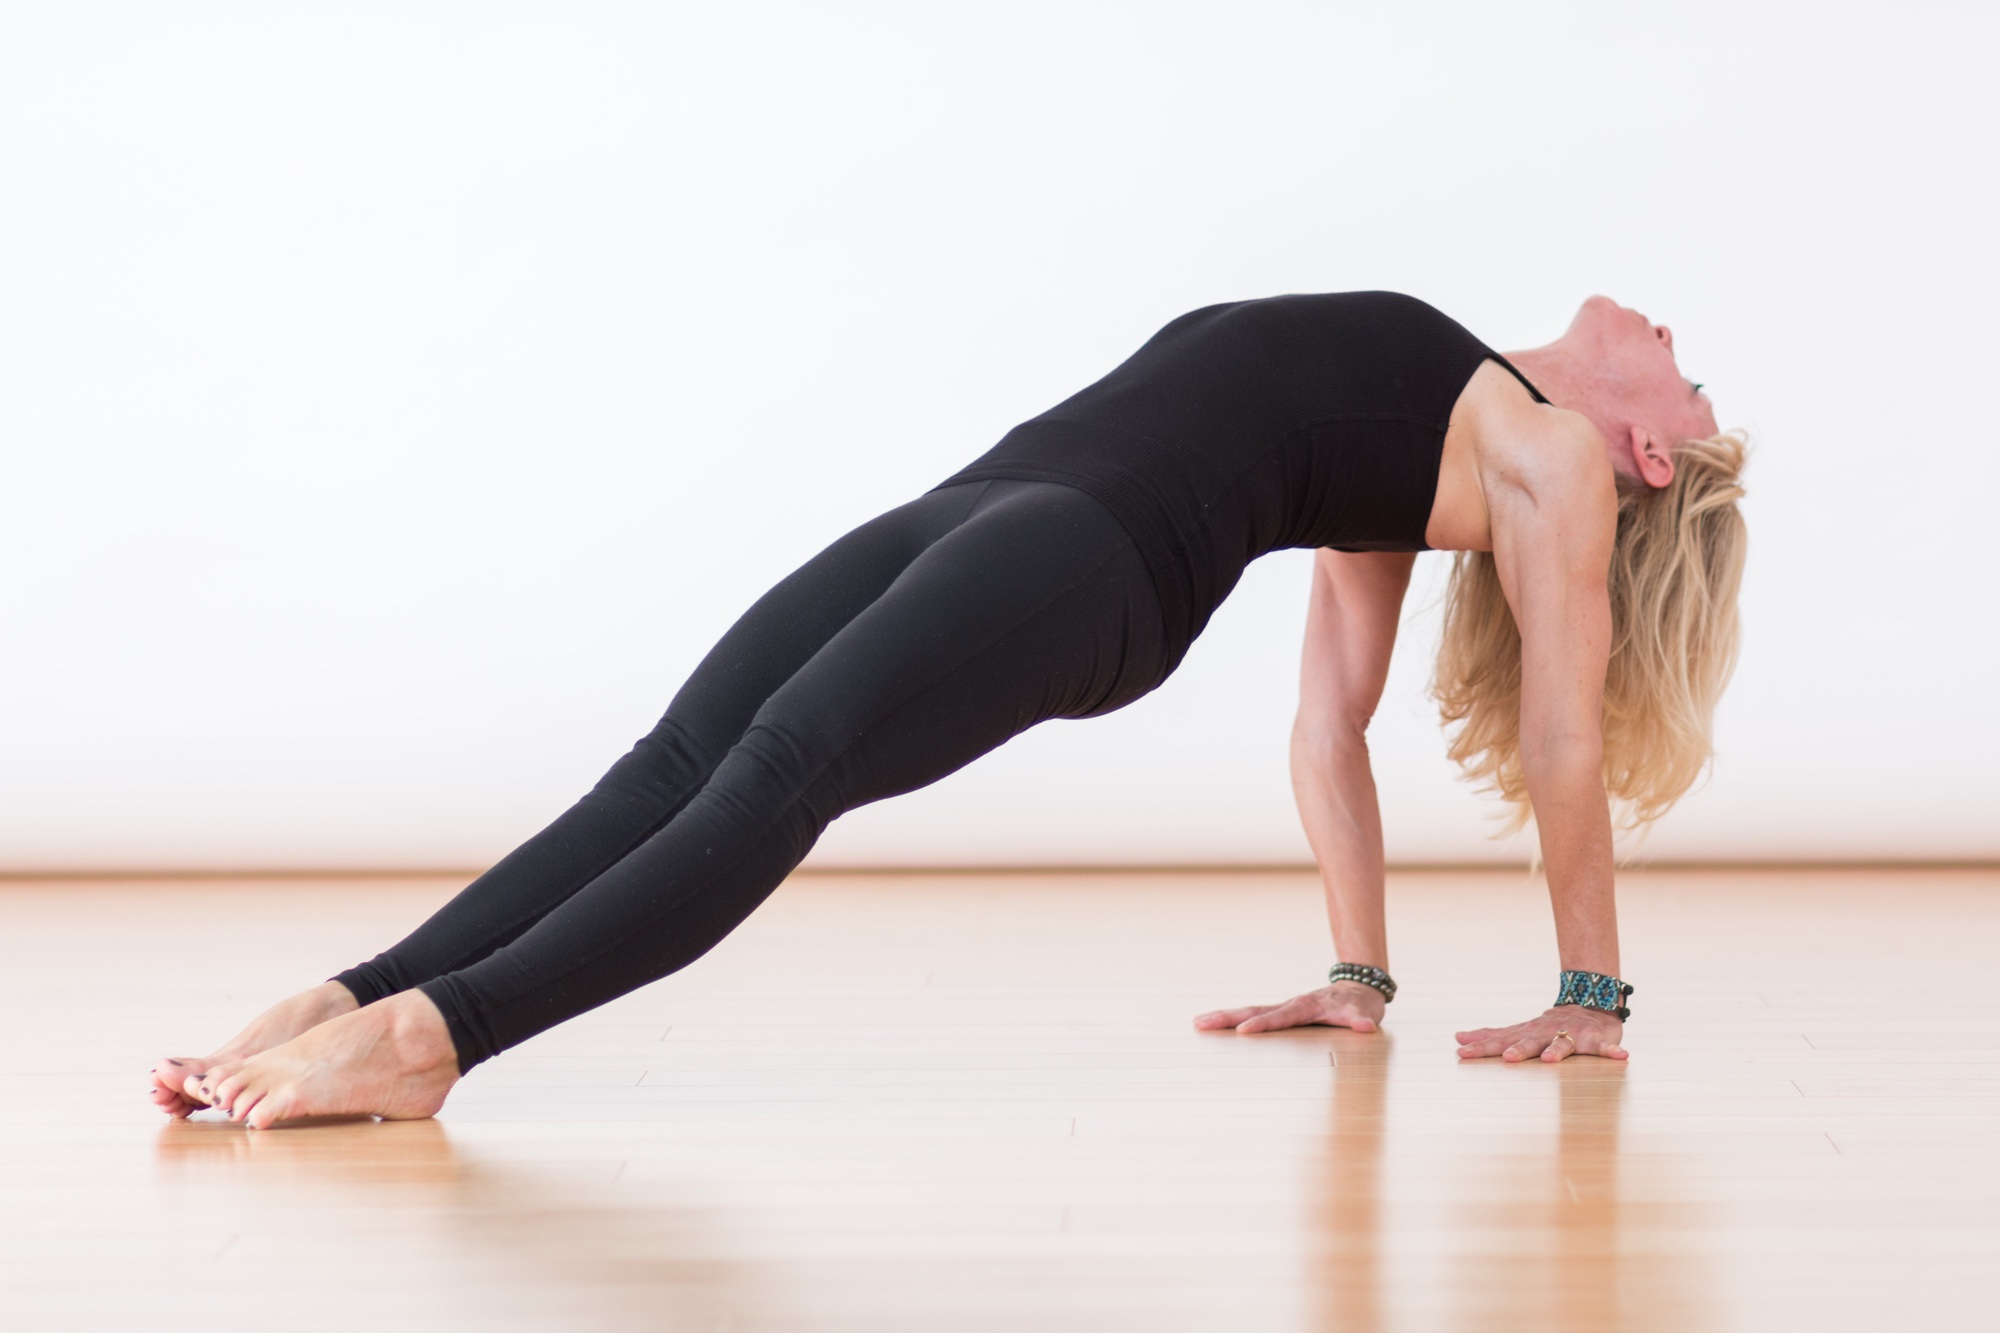
Richard Rosen's Asana Breakdown - PURVOTTANASANA 

East Pic.jpg

PURVOTTANASANA 
(poor-voh-tan-AHS-anna
purvottana = intense stretch of the East (purva = east; uttana = intense stretch) 


Stretch-of-the-East Pose. According to hatha yoga, the human body is a miniature representation of the world at large. The four “quarters” of the body, the front, back, head, and feet, are analogized with the four compass points. The front body then stands for the east (purva), the  quarter of the rising sun; conversely, the back body stands for the west (pashcima), where the sun sets. So we have two complementary poses, Purvottanasana and Pashcimottanasa. 

1. Sit in Staff Pose (dandasana) with your hands positioned on the floor slightly behind your pelvis, fingers pointing forward, toward your feet. Bend your knees and put your feet on the floor, slightly pigeon-toed, about a foot away from your buttocks. 

2. Inhale and lift your buttocks off the floor into a kind of “table” position. Your arms and forelegs will be more or less perpendicular to the floor, your torso and thighs parallel. For the time being keep your head in a neutral position, with your neck neither flexed nor extended. “Sharpen” your tail bone against the pelvis and “lengthen” it toward the knees as you roll your thighs inward. Firm your shoulder blades against your back, and press your inner hands actively into the floor.  

3. With an inhale stretch one leg forward and press the sole to the floor. Do the same with the other leg. If, when you reach out the legs, you lose the sharpness and length of the tail bone, it’s likely you’ll not be able to bring the soles fully and firm to the floor. So be sure to keep the tail sharp and long. Turn the toes slightly inward, press the inner feet firmly against the floor, and keep your thighs active. Hold your torso parallel to the floor by firming the shoulder blades against the back. 

4. You can keep your head in a neutral position. However, if your chest is open and your shoulder blades can descend actively toward your tail bone, you can drop your head back and extend the neck. Be careful though: the base of the skull shouldn’t jam against the nape. 

5. Hold this position for 30 seconds to a minute, breathing as softly as possible. Then release the buttocks to the floor with an exhale. 

- Benefits

Strengthens the arms and wrists, and the entire back of the body 
Stretches the entire front of the body
Stretches the front ankles 

- Contraindications: Avoid this pose if you have any shoulder or wrist injuries. If you have a neck injury, perform the pose a few inches away from a wall. Use the wall to support the back of your head to keep it in a neutral position (i.e., so the neck is neither flexed nor extended). 

- Modifications & Props: If you have some difficulty performing this pose on the floor, you can instead use a metal chair (be sure its four “feet” are standing securely on a sticky mat). Sit near the front edge of the seat, knees bent at right angles, feet on the floor. With your hands grip the back edge of the seat. Then with an inhale, lift your pelvis off the seat. You can keep your knees bent or straighten them, turning the big toes slightly inward and pressing the inner feet firmly against the floor. 

- Variations: This pose is usually described with the hands turned forward, pointing toward the feet. You can also perform Purvottanasana with your hands turned back, pointing away from the feet. 

- Beginners Tip: It might be difficult for some beginners to get their feet flat on the floor. Estimate where your feet will touch the floor in the full pose, and position a sand bag so that once in the pose it will support the balls of your feet.

- Advanced Tip: To intensify the work of this pose, inhale and lift your right foot off the floor and bring the leg parallel to the floor. Hold for 10 to 15 seconds. Release with an exhale, then repeat with the left leg for the same length of time. 

Video Links:

https://youtu.be/dlc6xCPx60U

https://youtu.be/NwFiWCUkk4M

https://youtu.be/Z5WGEMSdJ_s

Daksina - Divine Charity

shutterstock_707905822 copy.jpg

by Carly Boland, Advanced Certified Jivamukti Teacher and Reiki Master

The Jivamukti Teacher Training (JYTT) program is out of reach for many.  It is long, residential and pricey.  At one point three full scholarship spots became available for every JYTT program, a generous and earnest offer. But a surprising pattern emerged. The scholarship recipients, despite their sincere intentions, did not go on to become active Jivamukti teachers. In fact a stunning 87% of them did not continue to  practice Jivamukti Yoga even just a few years after the training.

This puzzling trend made a few things very obvious. We value what we invest in. Because our culture is generally fiscally oriented,  financial investment increases our sense of risk and responsibility towards our investment. Even though money is simply made of ordinary paper and metal, it is a token of one’s life energy. It is through our hard work that we give our life energy in order to earn money.

When I went to JYTT there was no full scholarship option. I received a partial scholarship and did a grueling work-trade in exchange for room and board At the time I did not know where the teachings would lead me or that theJivamukti Yogamethod would eventually shape each facet of my life. But I knew on some basal level, that it was worth it, and I made it work. Scraping together the money for tuition, and the hours of service for housing, on top of a demanding schedule was a process I will never forget. In sanskrit we call these types of actions, dedicated toward the attainment of Yoga, tapaḥ— austerity, penance or disciplined yogic practice. In Śrimad Bhagavatamtapaḥis defined as trueness to one’s responsibility. 

The interesting thing about our spiritual responsibility (dharma), is that it just comes to us. Often we don’t actively set out on the path, or if we do, it’s not the final destination. In this way, spiritual activities are often performed unknowingly. When something uncommon happens in our progressive spiritual life, this is understood to be incurred by ajñāta-sukṛti, or pious activities beyond one's knowledge. For me this occured when I met my teachers, so many small (and big) life events had to occur in order to create the situation to be just right for me to meet them, and to be able to receive their teachings. Once meeting the Teacher, the true test is the ability to hear and execute their instructions. 

Listen • Hear • Know • Become • Be

The first step of spiritual practice is to listen. It is recommended to listen to and surround yourself in the vibration of the ancient scriptures and the names of the Supreme Person 24/7. If you are surrounded by uplifting teachings and mantra, but not listening, do not fear! There is still some benefit!

But we have to deeply listen in order to truly hear and it is from this hearing that we can begin to know.

With knowledge, then we begin to make informed choices on our spiritual path, engaging in activities for the benefit of all living beings and eventually we may become who we really are. According to Yogic scripture, who we really are is a spark from the divine flame, eternal, full of knowledge and full of bliss. Any act on the spiritual path, purposeful or accidental brings us closer to this essence so we can be who we truly are. 

The simple act of giving a donation for spiritual knowledge is one of these unrecognized actions of dharma. In the yogic tradition it is called daksina,which translates to mean charity for opening one’s eyes with knowledge. This form of charity is not mundane; in actuality it is not for the benefit of the teacher. It is for the benefit of the one receiving the wisdom, that they may be purified and able to truly hear the teachings.

I’ve had this debate with friends again and again; 

Shouldn’t yoga classes be free?

Shouldn't yoga just be provided for all?!

Why do I have to pay?

There are the obvious expenses that go in to offering a class (electricity, mortgage, insurance, maintenance, endless continuing education of the teachers, etc.) But even aside from this, over the years I’ve done my fair share of inviting friends (and random acquaintances) to come to class for free. I’ve found, while this approach is heartfelt in its purpose, often the student who attends for free does not value the teachings and inevitably does not commit to the practices.

Once a sincere student approached me and said, I am unable to continue paying, but I want to remain your student, IS THERE ANYTHING I CAN DO IN EXCHANGE FOR CLASSES? I offered her a few simple tasks, and she became my most regular student. She came 30 minutes prior to class to take care of her responsibilities and stayed after helping to clear the space. According to the Vedic model of Yoga, daksina offering is a reciprocation and act of gratitude. It is not intended as a simple exchange to provide means for the teacher to support themselves in material life (though this is a subject for another day). The exchange empowers the receiver to better understand the knowledge. 

“It is an ancient tradition to give something in return for spiritual knowledge, because by that sacrifice one is connected to the previous teachers who have painstakingly passed this wisdom down to us over the ages.” -Vaisesika Dasa.

I have been very blessed to have so many amazing teachers, and one of the most wonderful things that unifies each of my teachers is that they all credit everything that they have to offer to their teachers. This is a beautiful mood of humility that carries us through the practice of Yoga. Through the grace of my teachers, the greatest teachings have come to me through reading transcendental literature. These books of realized wisdom have revealed to me the Ultimate Dharma, the ultimate aim of Yoga is to Awaken Our Love for the Supreme Person. When we make that connection with the Lord, we can live in harmony with the environment and with each other.

Because the wisdom in these Yogic books has made such a big impact on my life, part of my practice now is to share these books with others. My first proclivity is to give these books away to everyone I meet! But, similarly to the Yoga classes, I’ve come to realize that we do not value what we do not invest in. Donations are a part of the spiritual process. The exchange actually gives potency to insights gained through our time with authentic teachers and teachings. Investing in spiritual life is the greatest form of divine charity. If you would like to read some text that will help bring you closer to your true nature, truth, eternal wisdom and happiness, please let me know and I’m happy to connect you to a book that will uplift your life. 

Hope to see you for class soon,

carly

 Recommended Transcendental Literature:

 Jivamukti Yoga Sharon Gannon and David Life

The Journey Home Radhanath Swami

Bhagavad Gita As It Is A.C. Bhaktivedanta Swami Prabhupada

Gita Wisdom Joshua M. Greene 

Dance of Divine Love: India's Classic Sacred Love Story: The Rasa Lila of Krishna Graham Schweig

Inner Goddess Shyamdas

The Yoga Sutras of Patañjali: A New Edition, Translation, and Commentary  Edwin F. Bryant

RICHARD ROSEN'S ASANA BREAKDOWN - EKA PADA RAJAKAPOTASANA

JAMP8.jpg

EKA PADA RAJAKAPOTASANA(aa-KAH pah-DAH rah-JAH-cop-poh-TAHS-anna)
eka = one
pada = foot or leg 
raja = king
kapota = pigeon or dove 

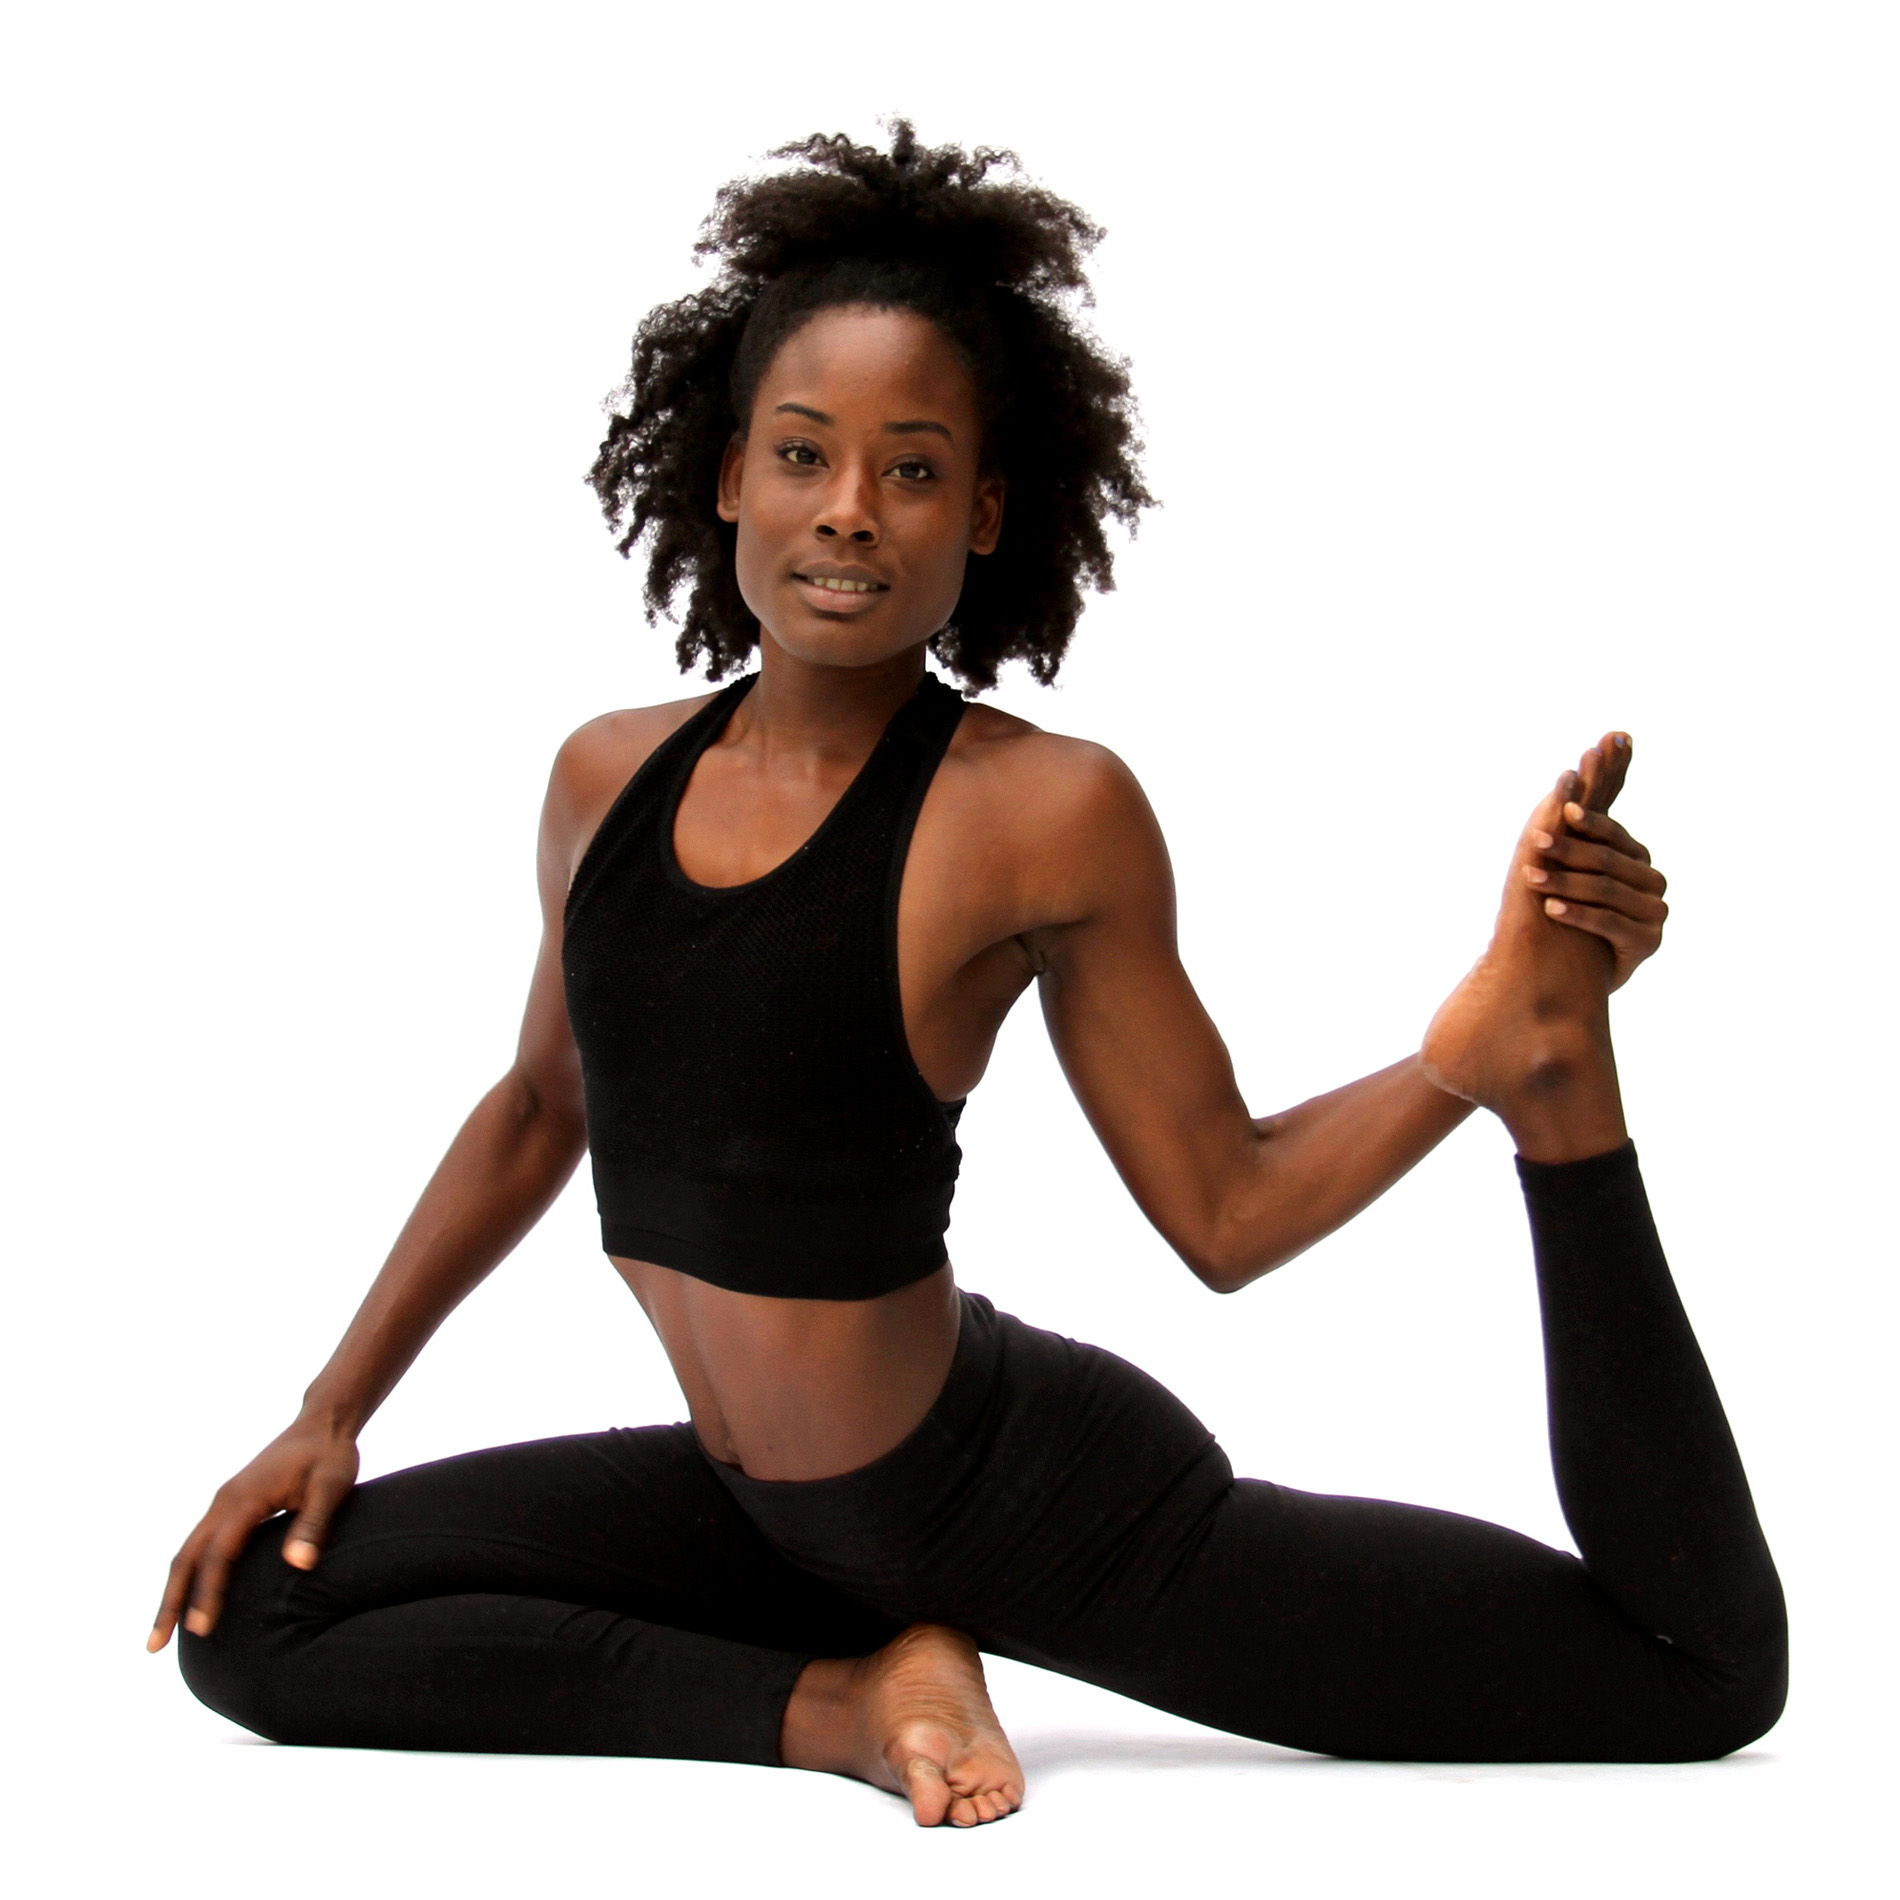
One-Leg King-Pigeon Pose. The full pose involves a deep back bend, which puffs the chest, resembling that of a pigeon. Included here are three levels of poses, beginning, experienced beginning, and intermediate. The first of these will be described immediately below. The other two will be described in the VARIATION section near the end of this piece. 

NOTE: This pose SHOULD NOT be performed as a warm-up, it should ONLY be performed after sufficient hip openers have been practiced. Suggested hip opening preps are listed in PREPARATORY ASANAS below. 

1. Begin on all-fours, with your knees directly below your hips, and your hands slightly ahead of your shoulders. You might want to place a blanket under your knees for padding. Slide your right knee forward just to the outside of your right wrist. At the same time angle your right shin diagonally under your torso and bring your right heel to the front of your left knee. The outside of your right shin will now rest on the floor. Slowly slide your left leg back, straightening the knee and descending the front of the left leg to the floor and the outside of your right thigh/buttock to the floor. Position the right heel just in front of the left hip. 

NOTE: If the right buttock doesn’t touch the floor, support it on a block or thickly folded blanket. 

2. The right knee can angle slightly to the right, outside the line of the hip. Look back at your left leg. It should extend straight out of the hip (and not be angled off to the left), and rotated slightly inwardly, so the little toe and the center of the knee cap presses against the floor. Exhale and lay your torso down on the inner right thigh, stretch your arms forward. Stay for about a minute.

3. To lift the torso to upright, DON’T push it up with your hands. Lift it by drawing the tail bone down to the floor, use your hands to gently guide the torso upright. Then push your fingertips firmly to the floor. Inhale and lift your hip points away from the thighs. Lengthen the lower back by pressing your tail bone down and forward; at the same time, and lift your pubis toward the navel, closing the space between the pubis and navel. Roll your left hip point toward the right heel, and lengthen the left front groin. 

4. If you can maintain the upright position of your torso without the support of your hands on the floor, bring your hands to the lower rim of your rib case. Lift the rim, moving the back rim faster than the front, be sure not to push the front ribs forward. For this beginning pose, keep your head in a neutral position, look straight forward. To open your chest, lift the top of your sternum (at the manubrium) straight up toward the ceiling. 

NOTE: If supporting your torso upright without using your hands is difficult, there are two alternatives to try: 1) perform the pose facing a wall, with the front knee close to the wall. To lift the torso upright, press your hands to the wall in front of your shoulders; 2) perform the pose in front of a yoga chair, then use the chair seat to support the torso. 

5. Stay in this position for a minute. Then, with your hands back on the floor, carefully slide the left knee forward, turn the back toes under, inhale, and lift up and back into Downward Facing Dog (Adho Mukha Shvanasana). Take a few breaths, drop the knees and return to all-fours on another exhale, and repeat with the legs reversed for the same length of time. 

- BENEFITS
Stretches the thighs, groins (and psoas), abdomen, chest and shoulders, and neck 
Stimulates the abdominal organs 
Opens the shoulders and chest 

- CONTRAINDICATIONS
Ankle injury
Knee injury 
Tight hips or thighs 

- MODIFICATIONS & PROPS  
It’s often difficult to descend the outside of the front-leg hip all the way to the floor. Use a thickly folded blanket to support the hip. 

- VARIATION 
1. Modified full pose. From the leg position described above, bend the back-leg knee, bring the heel as close as you can to the back torso, then reach back with the same-side hand, and with the arm parallel to the floor, hold the ankle. The off-side hand continues to support the upright torso. Stay for a minute or so, then release and repeat on the other side for the same length of time.

2. Full pose. Snug a yoga strap around your left foot with the buckle on the sole side. Perform the preliminary leg position described above, strap laying along your left side. Bend the left knee, take hold of the strap and sling it over your left shoulder. Then holding the belt in both hands, stretch your arms upward toward the ceiling and pull gently on the belt. With the arms more or less parallel to each other, slowly and GENTLY walk your hands down the strap toward the left foot. Don’t pull on the strap. When you’ve reached what feels like a reasonable stretch, stop and hold for 30 seconds to a minute. Release with an exhale, repeat on the other side. 

- PREPARATORY ASANAS
Bound Angle (Baddha Konasana)
Serpent (Bhujangasana)
Cow Face (Gomukhasana)
Bridge (Setu Bandha)
Recline Hero/Heroine (Supta Virasana)
Recline Bound Angle (Supta Baddha Konasana)
Side Angle Pose (Utthita Parsvakonasana)
Triangle (Utthita Trikonasana)
Tree (Vrkshasana)


- FOLLOW-UP ASANAS
Eka Pada Rajakapotasana is actually the first in a series of four, increasingly difficult Pigeon poses. In each of the three successive poses the forward leg is placed in a slightly different position. In the second variation the forward foot is standing on the floor just in front of the same-side buttock, with the knee angled well forward of the heel. In the third variation the forward leg is in Ardha Virasana, while in the fourth the leg is stretched straight forward of the pelvis. Other possibilities (leg position only): 

- ADVANCED TIP
The lift of the lower back ribs (as described in step 4 above) “triggers” the lift of the arms. From the lift of the ribs (away from the pelvis), push your elbows closer to the ceiling. Feel the length grow along the backs of the arms and along the armpits. Then “pin” the elbows to the ceiling and release or “hang” the rib case toward the pelvis. Go on yo-yo-ing the ribs: relative to the pelvis the ribs lift, boosting the arms closer to the ceiling; relative to the arms the ribs drop, helping to open the armpits. 

- PARTNERING
Your partner can help with the lift of the arms. Perform the pose to your capacity, whether your hands are gripping the foot or a strap. Have your partner stand behind you. He should press his hands against your outer upper arms, just above the shoulder, and lift the outer arms toward the elbows. Release your side ribs down, away from the arms. Keep the tops of your shoulders soft.